
T2 Iris — Setting Up Transaction Reports
Last updated September 2, 2026
This guide covers configuring two scheduled transaction reports in T2 Iris: an on-demand This Year report and a recurring daily Yesterday report.
Both reports use the same base configuration. Only the date range (and the schedule, for the Yesterday report) differ.
Report 1: All Transactions — This Year
Path: Reports → Report
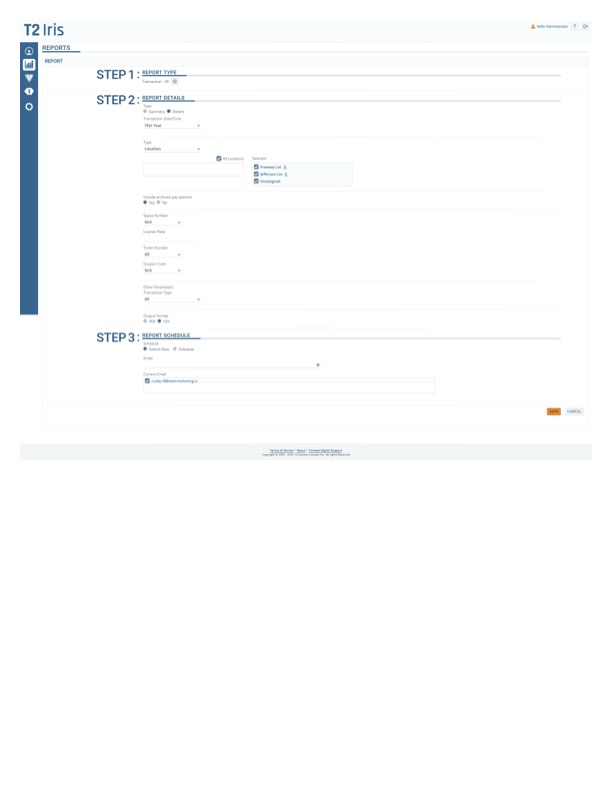
Step 1: Report Type
- Type:
Transaction - All
Step 2: Report Details
- Type: Details
- Transaction Date/Time:
This Year - Location Type: Location
- Locations: Check All Locations (Freeway Lot, Jefferson Lot, Unassigned should all be checked)
- Include archived pay stations: Yes
- Space Number: N/A
- License Plate: (leave blank)
- Ticket Number: All
- Coupon Code: N/A
- Other Parameters — Transaction Type: All
- Output Format: CSV
Step 3: Report Schedule
- Schedule: Submit Now
- Email: Enter the recipient email address, then click the + button to add it — it must appear under Current Email before saving, or it won't be included.
- Click Save.
Report 2: All Transactions — Yesterday (Recurring)
Path: Reports → Report
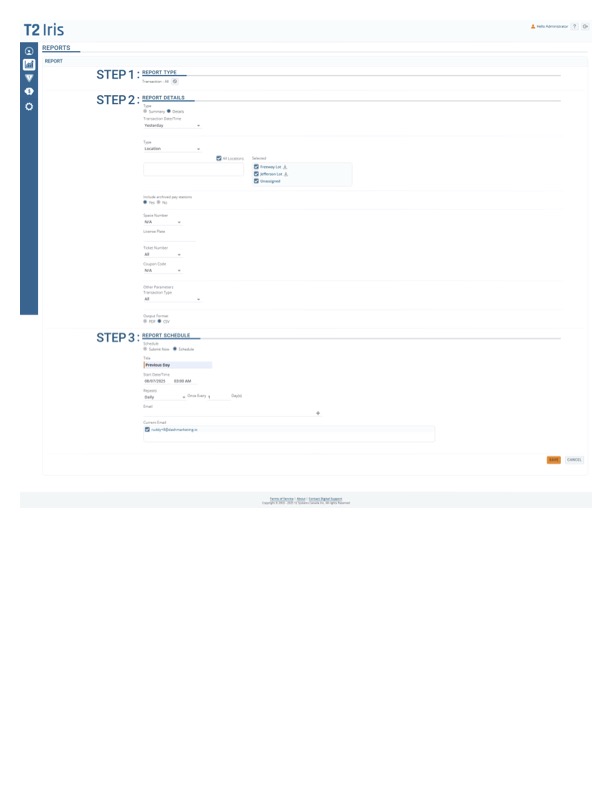
Step 1: Report Type
- Type:
Transaction - All
Step 2: Report Details
Same as above, except:
- Transaction Date/Time:
Yesterday
All other fields (Location, archived pay stations, Space Number, Ticket Number, Coupon Code, Transaction Type, Output Format) are configured identically to Report 1 above.
Step 3: Report Schedule
- Schedule: Schedule
- Title:
Previous Day - Start Date/Time: Set to the desired first run date/time (e.g.
08/07/2025 03:00 AM) - Repeats: Daily — Once Every
1Day(s) - Email: Enter the recipient email address, then click the + button to add it — confirm it appears under Current Email before saving.
- Click Save.
Notes
- The + button after entering an email is required in both flows — without it, the address won't be attached to the report and it will save with no recipient.
- Output format is CSV for both reports, not PDF.
Was this page helpful?