
Create a New Form
Last updated August 27, 2026
Navigate to the form section within the platform menu.
To create a new form, click the Create Form icon in the top right corner.
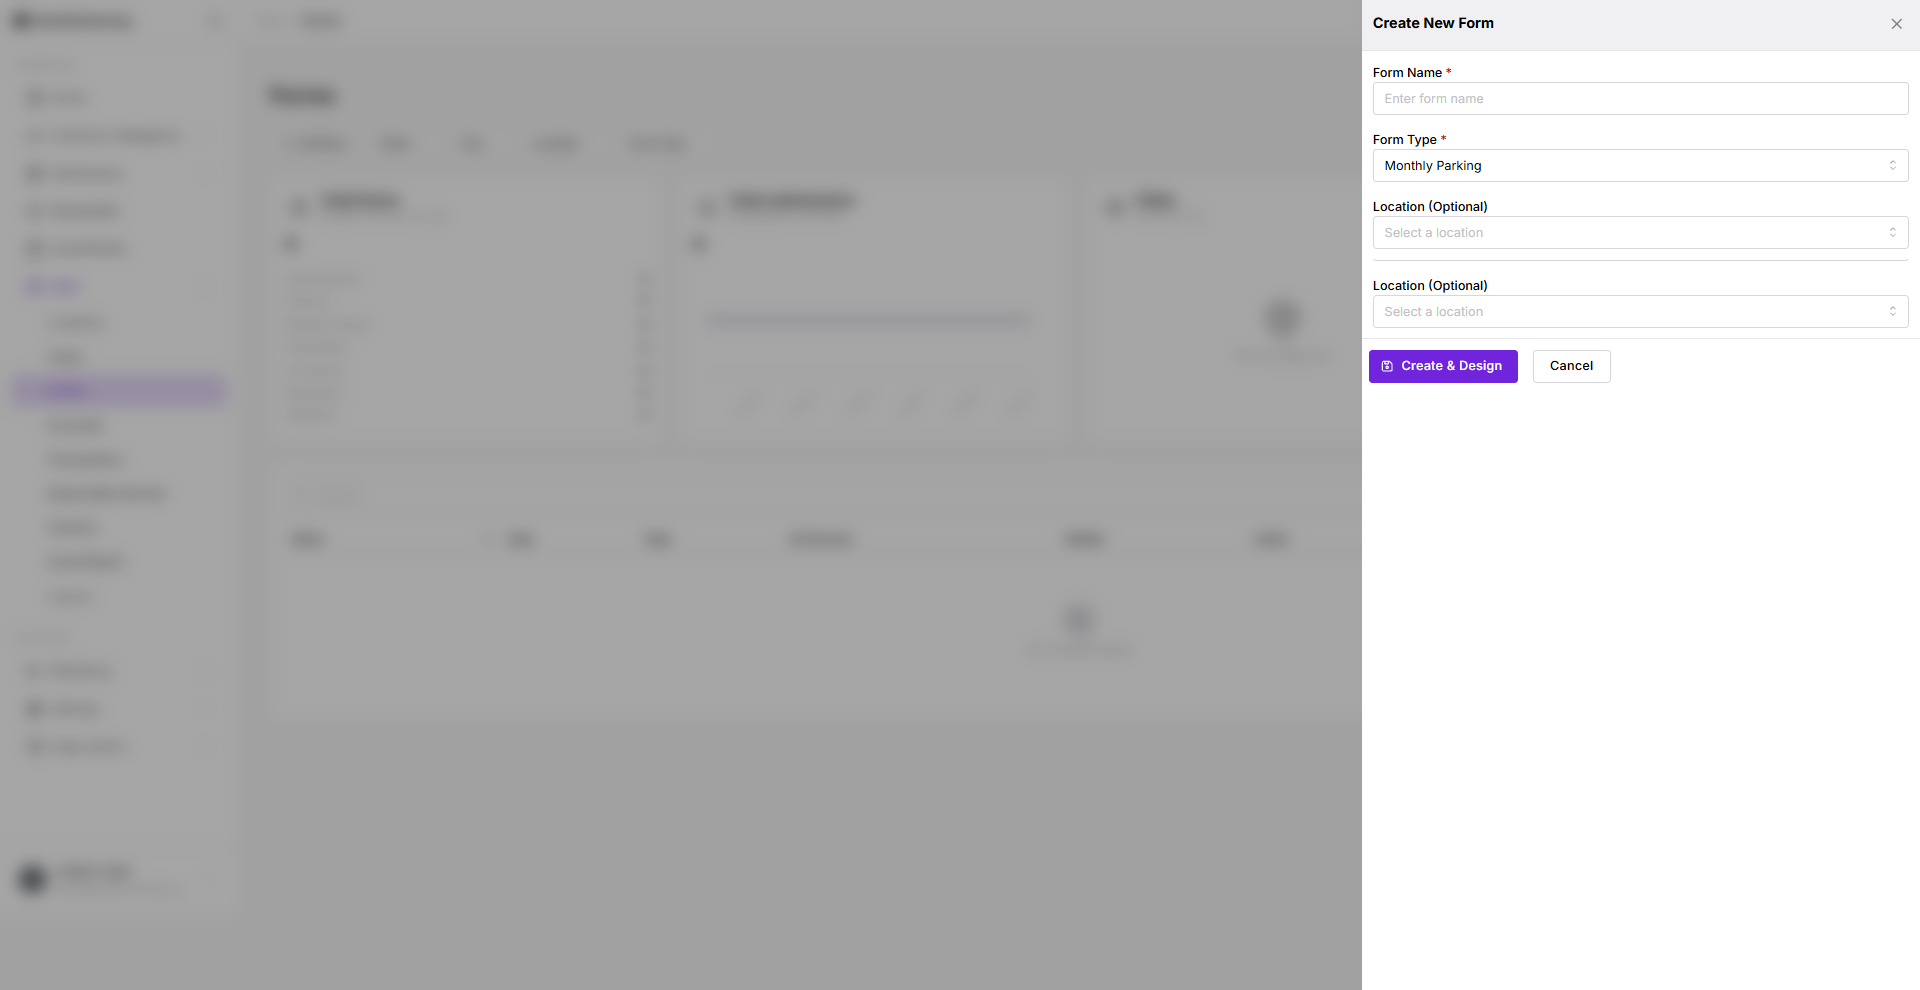
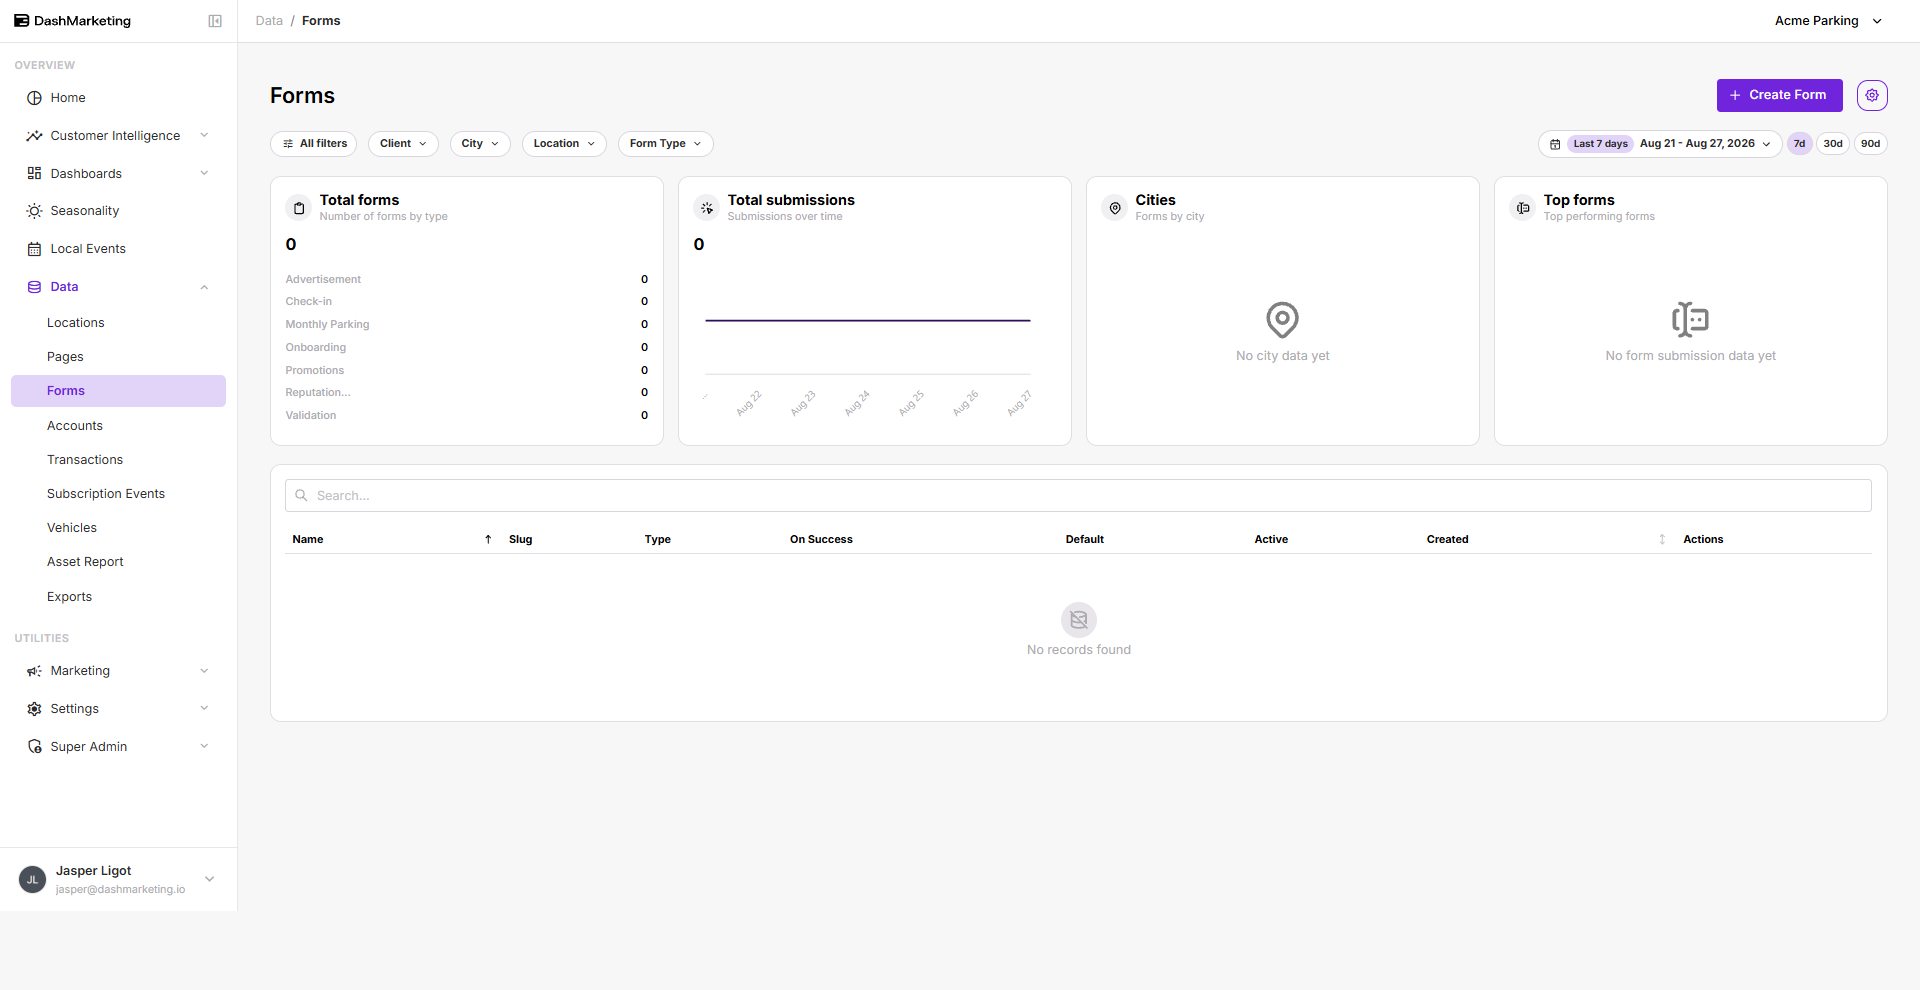 A new form will request the following information:
- Form Name
- Form type (e.g. Monthly Parking)
- Location — you can assign it to a location now or in the future
Start by entering a form name, which ideally should be the name of the location, then select a form type. After that, click Create and Design to continue.
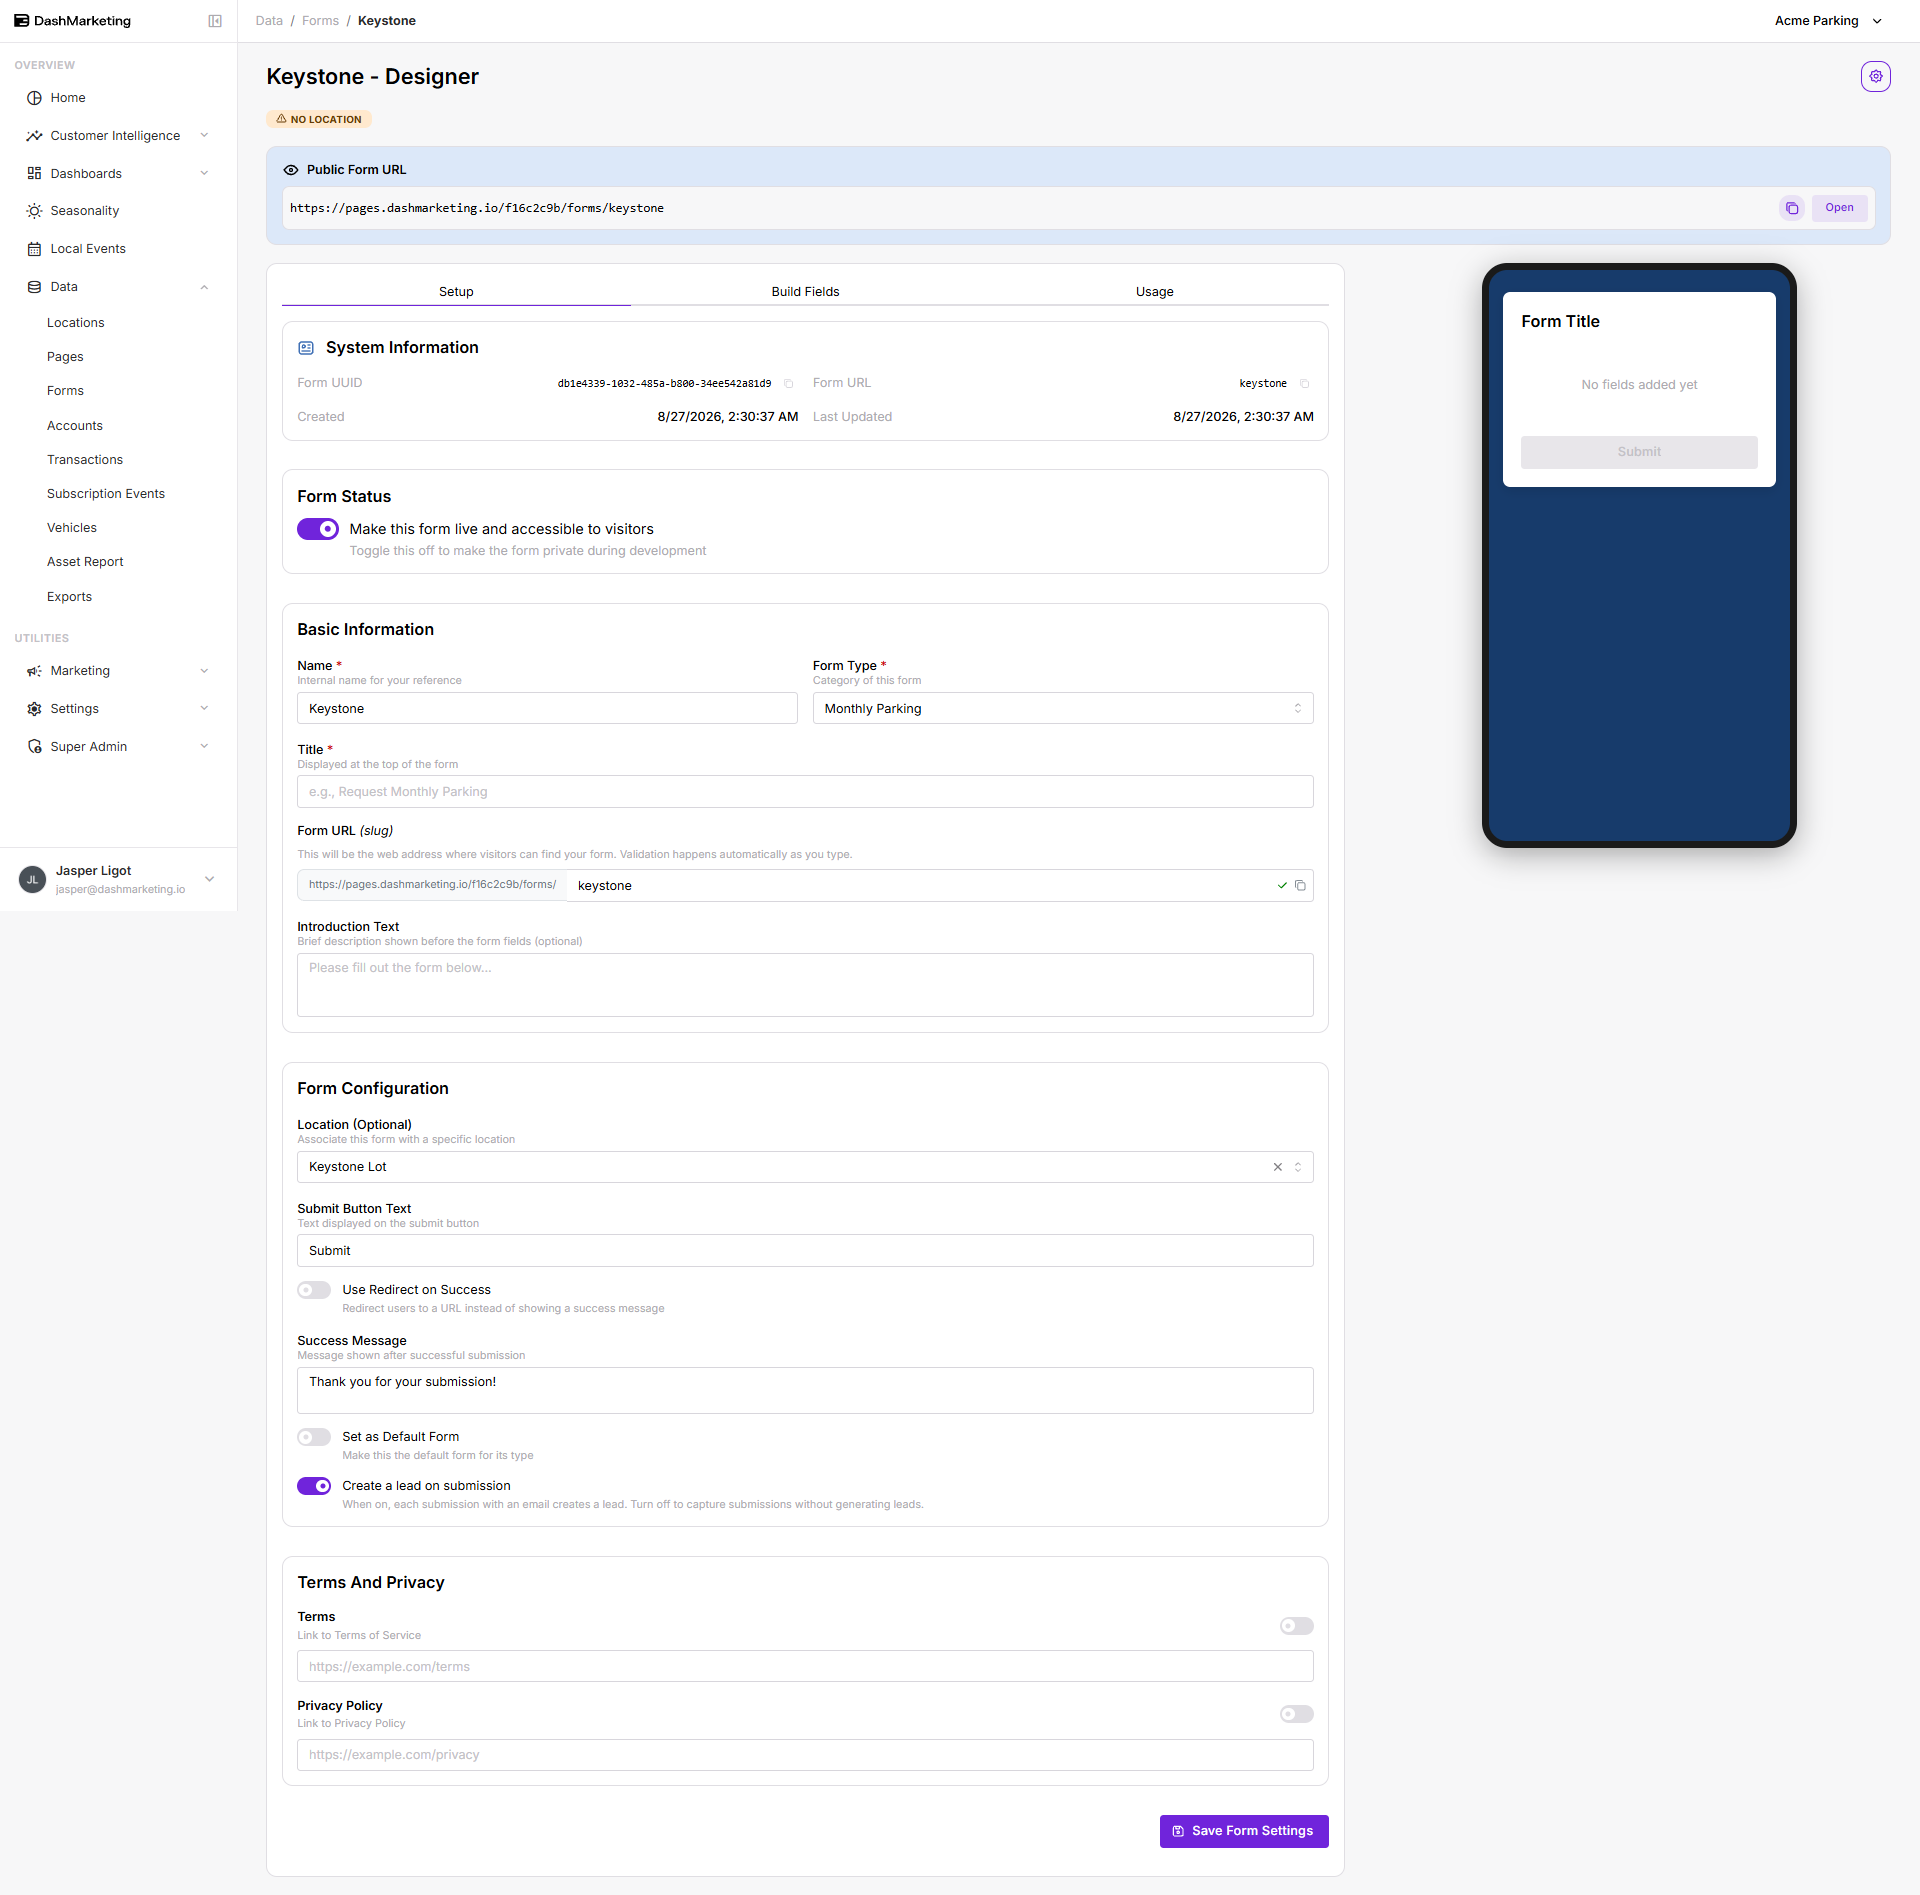
Setup
In the Setup section, the Name, Form Type, and Form URL slug fields are already pre-populated based on the steps completed earlier. For the Title, you can mirror the selected Form Type — for example, if you chose Monthly Parking, then "Monthly Parking" can be used as the Title. Location is optional, but from the list of available locations, it should most of the time match the name of the form.
At the bottom of the page, there's a toggle for Use Redirect on Success. This is used for the Monthly Parking Form. If you have the link for the monthly parking link (for example from Chargify or ParkingBase), toggle this on and input the URL. If you haven't gotten the link yet, leave it toggled off for now.
Don't forget to click Save Form Settings whenever you make changes on this page.
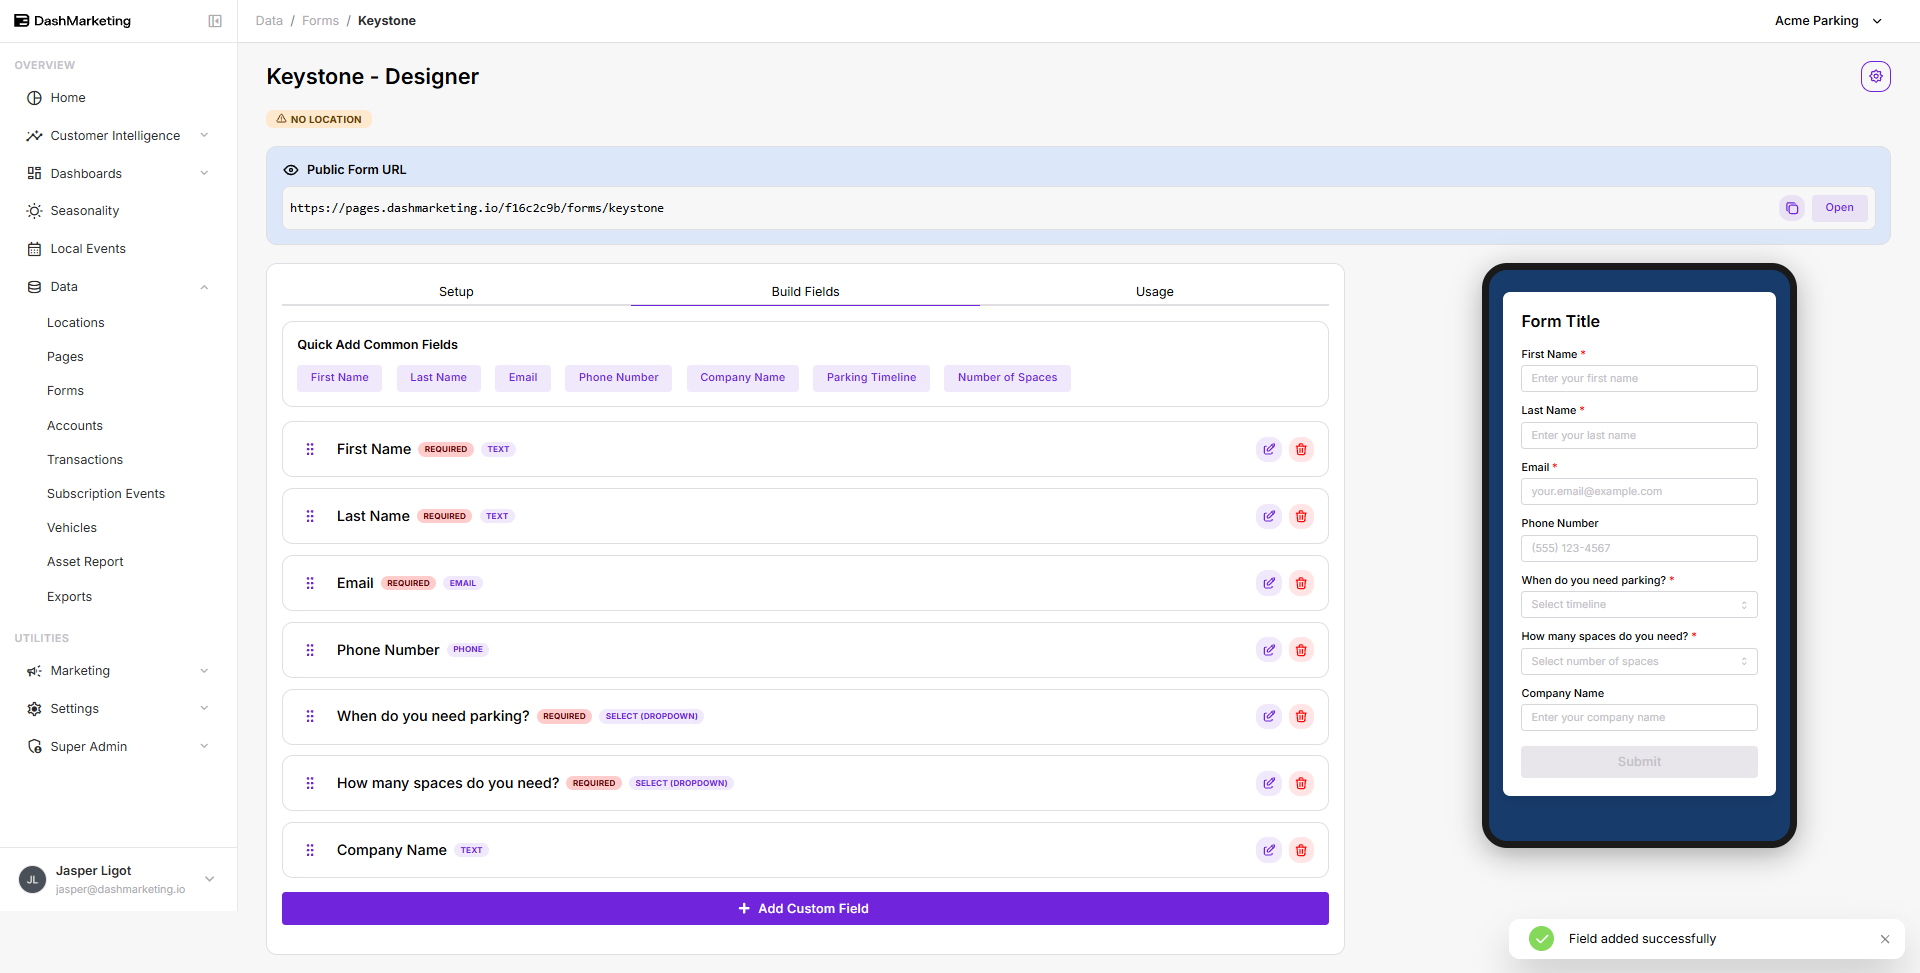
Build Fields
In the Build Fields section, you can create the structure of the form. Most of the time, you can use the options in Quick Add Common Fields. For this example, using the Monthly Parking Form, add the following fields in order:
- First Name
- Last Name
- Phone Number
- Parking Timeline
- Number of Spaces
- Company Name
After adding each field, the Monthly Parking form should appear as shown in the image below. To edit a field, click the pencil icon on the right side of the screen.
If the desired field is not listed, you can create a custom one using the Add Custom Fields option.
Usage
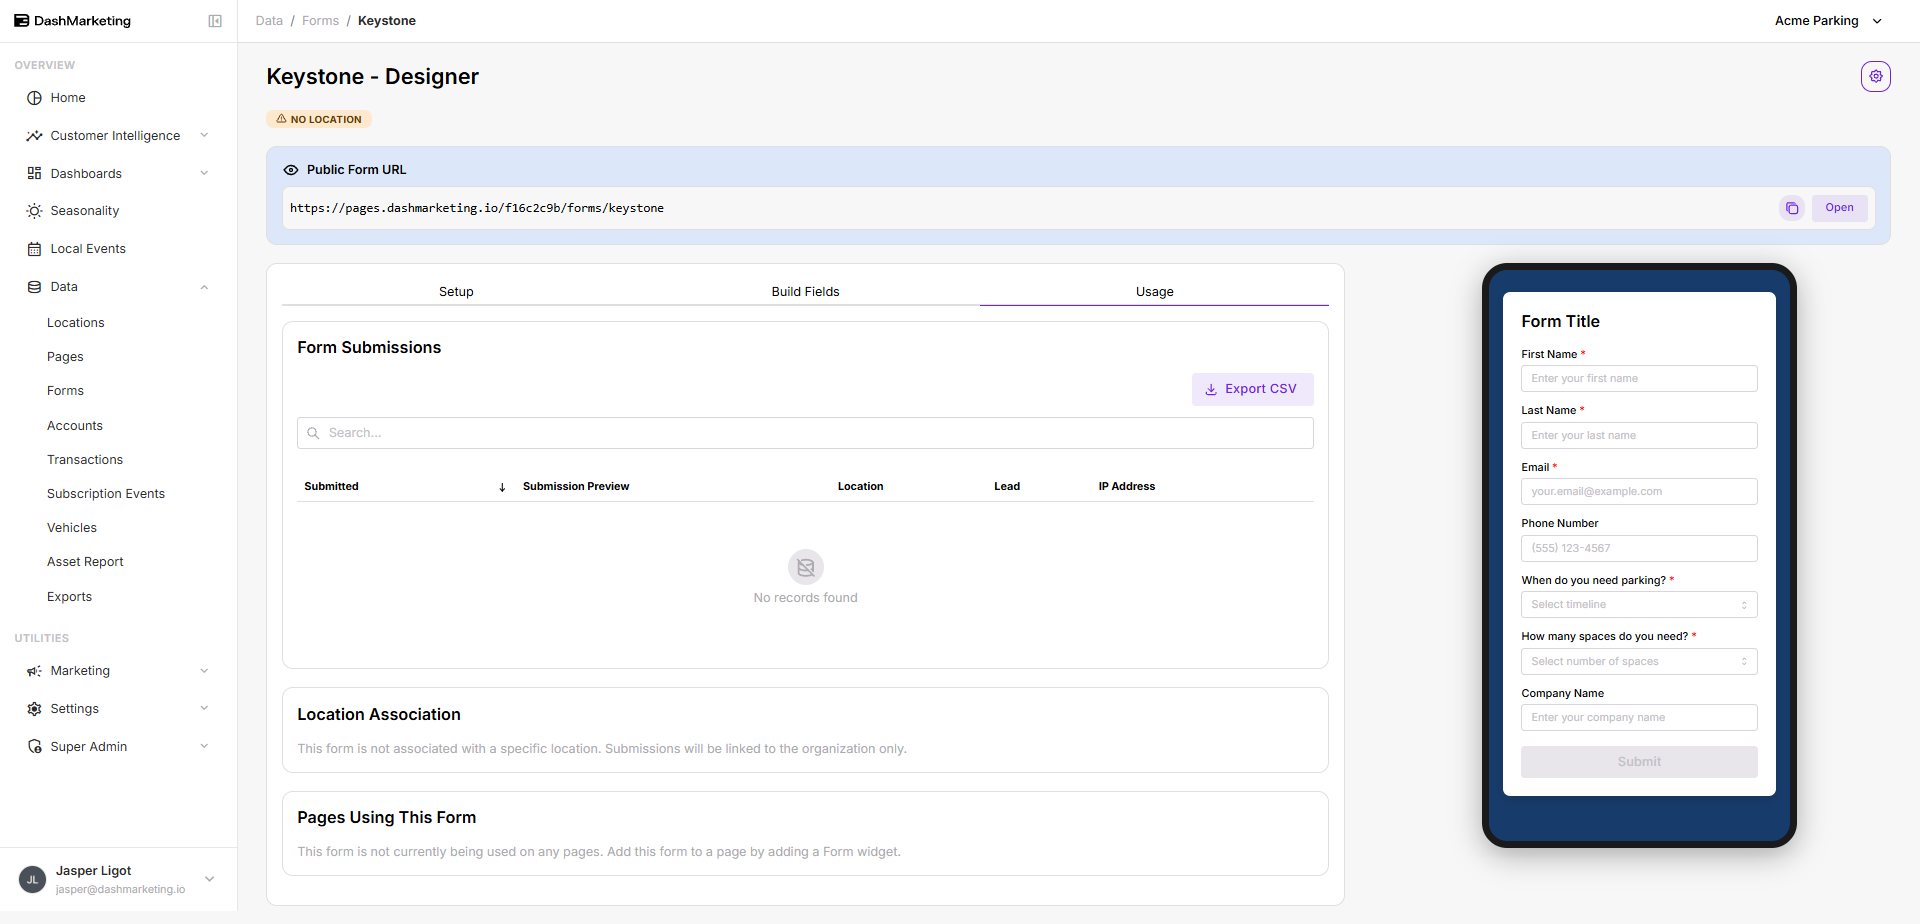
In the Usage section, you can see where this form is being used or linked. Under Form Submissions on the page, you can view anyone who has completed the form.
In the Setup section, there's an optional field called Location. If a location was selected there, it will appear under Location Association. If the form is connected to a page, it will be displayed under Pages Using This Form.
Was this page helpful?