
Setting up a client
Last updated August 29, 2026
Creating a client is a two-part job: the client record (who they are, which locations are theirs) and the client users (the people who log in). This page covers the record. Users are covered in Client users and roles.
 Do the record first — you can't invite a client user until the client exists.
Where clients live
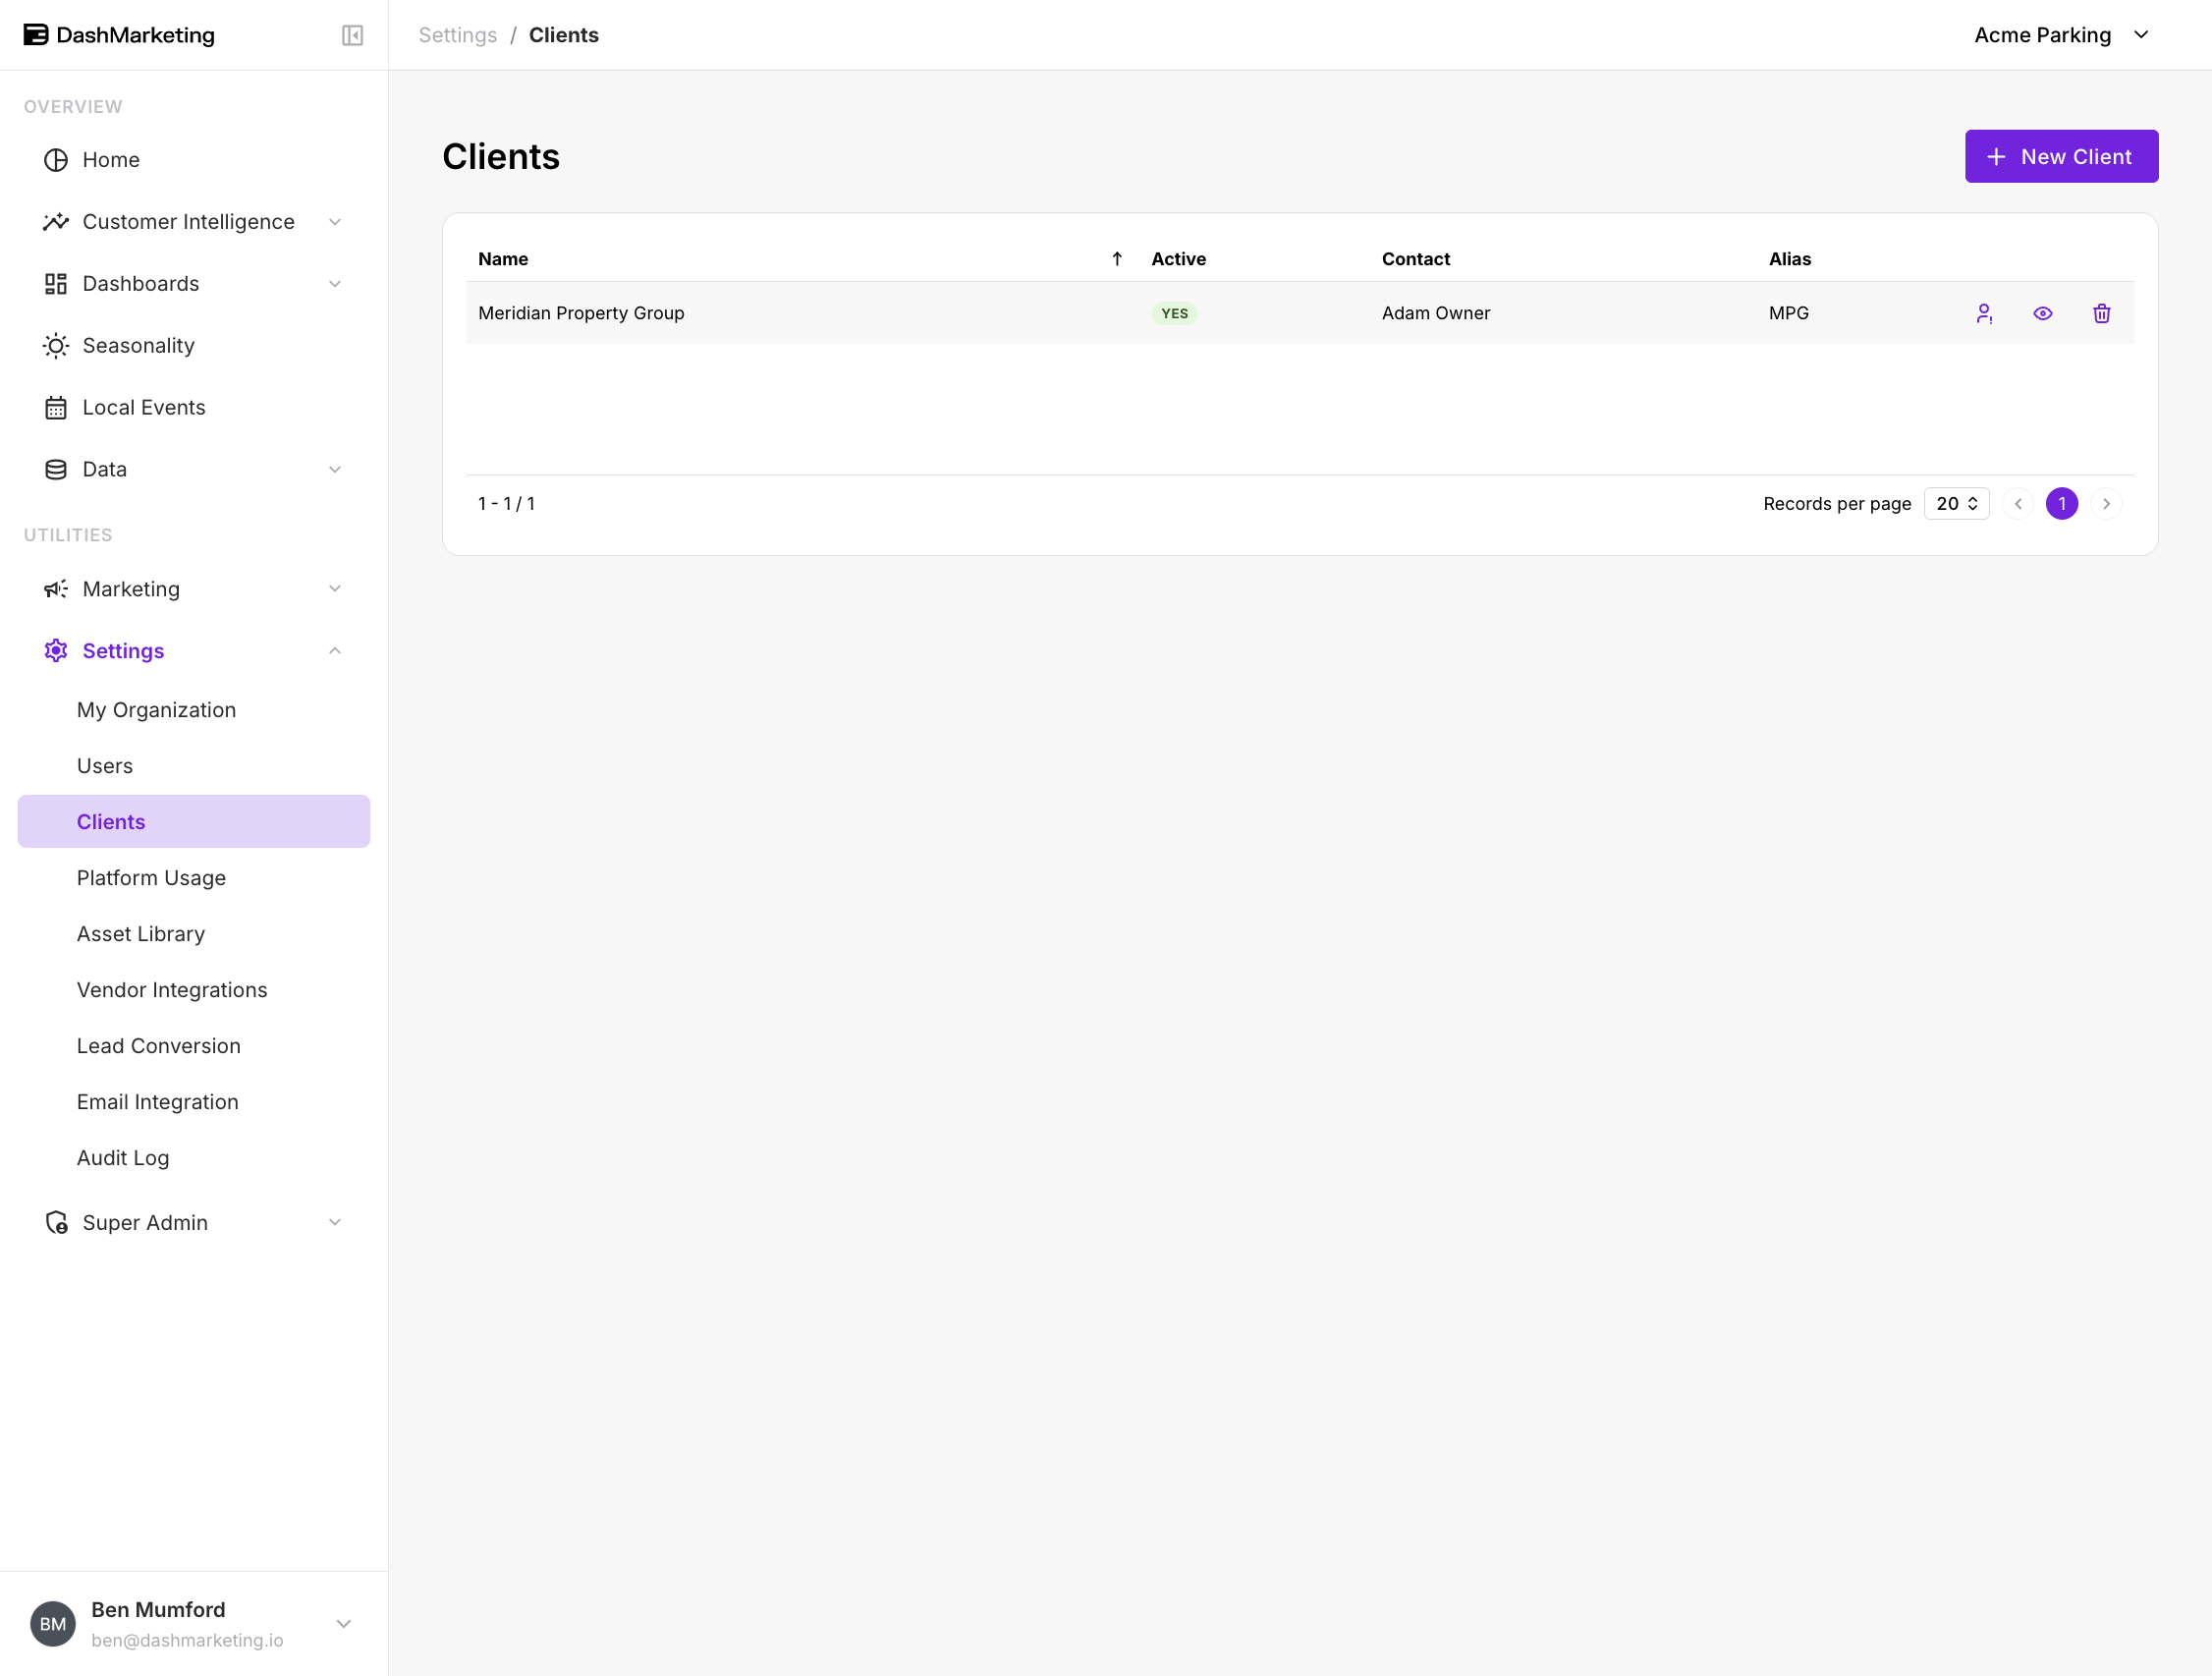
Settings → Clients
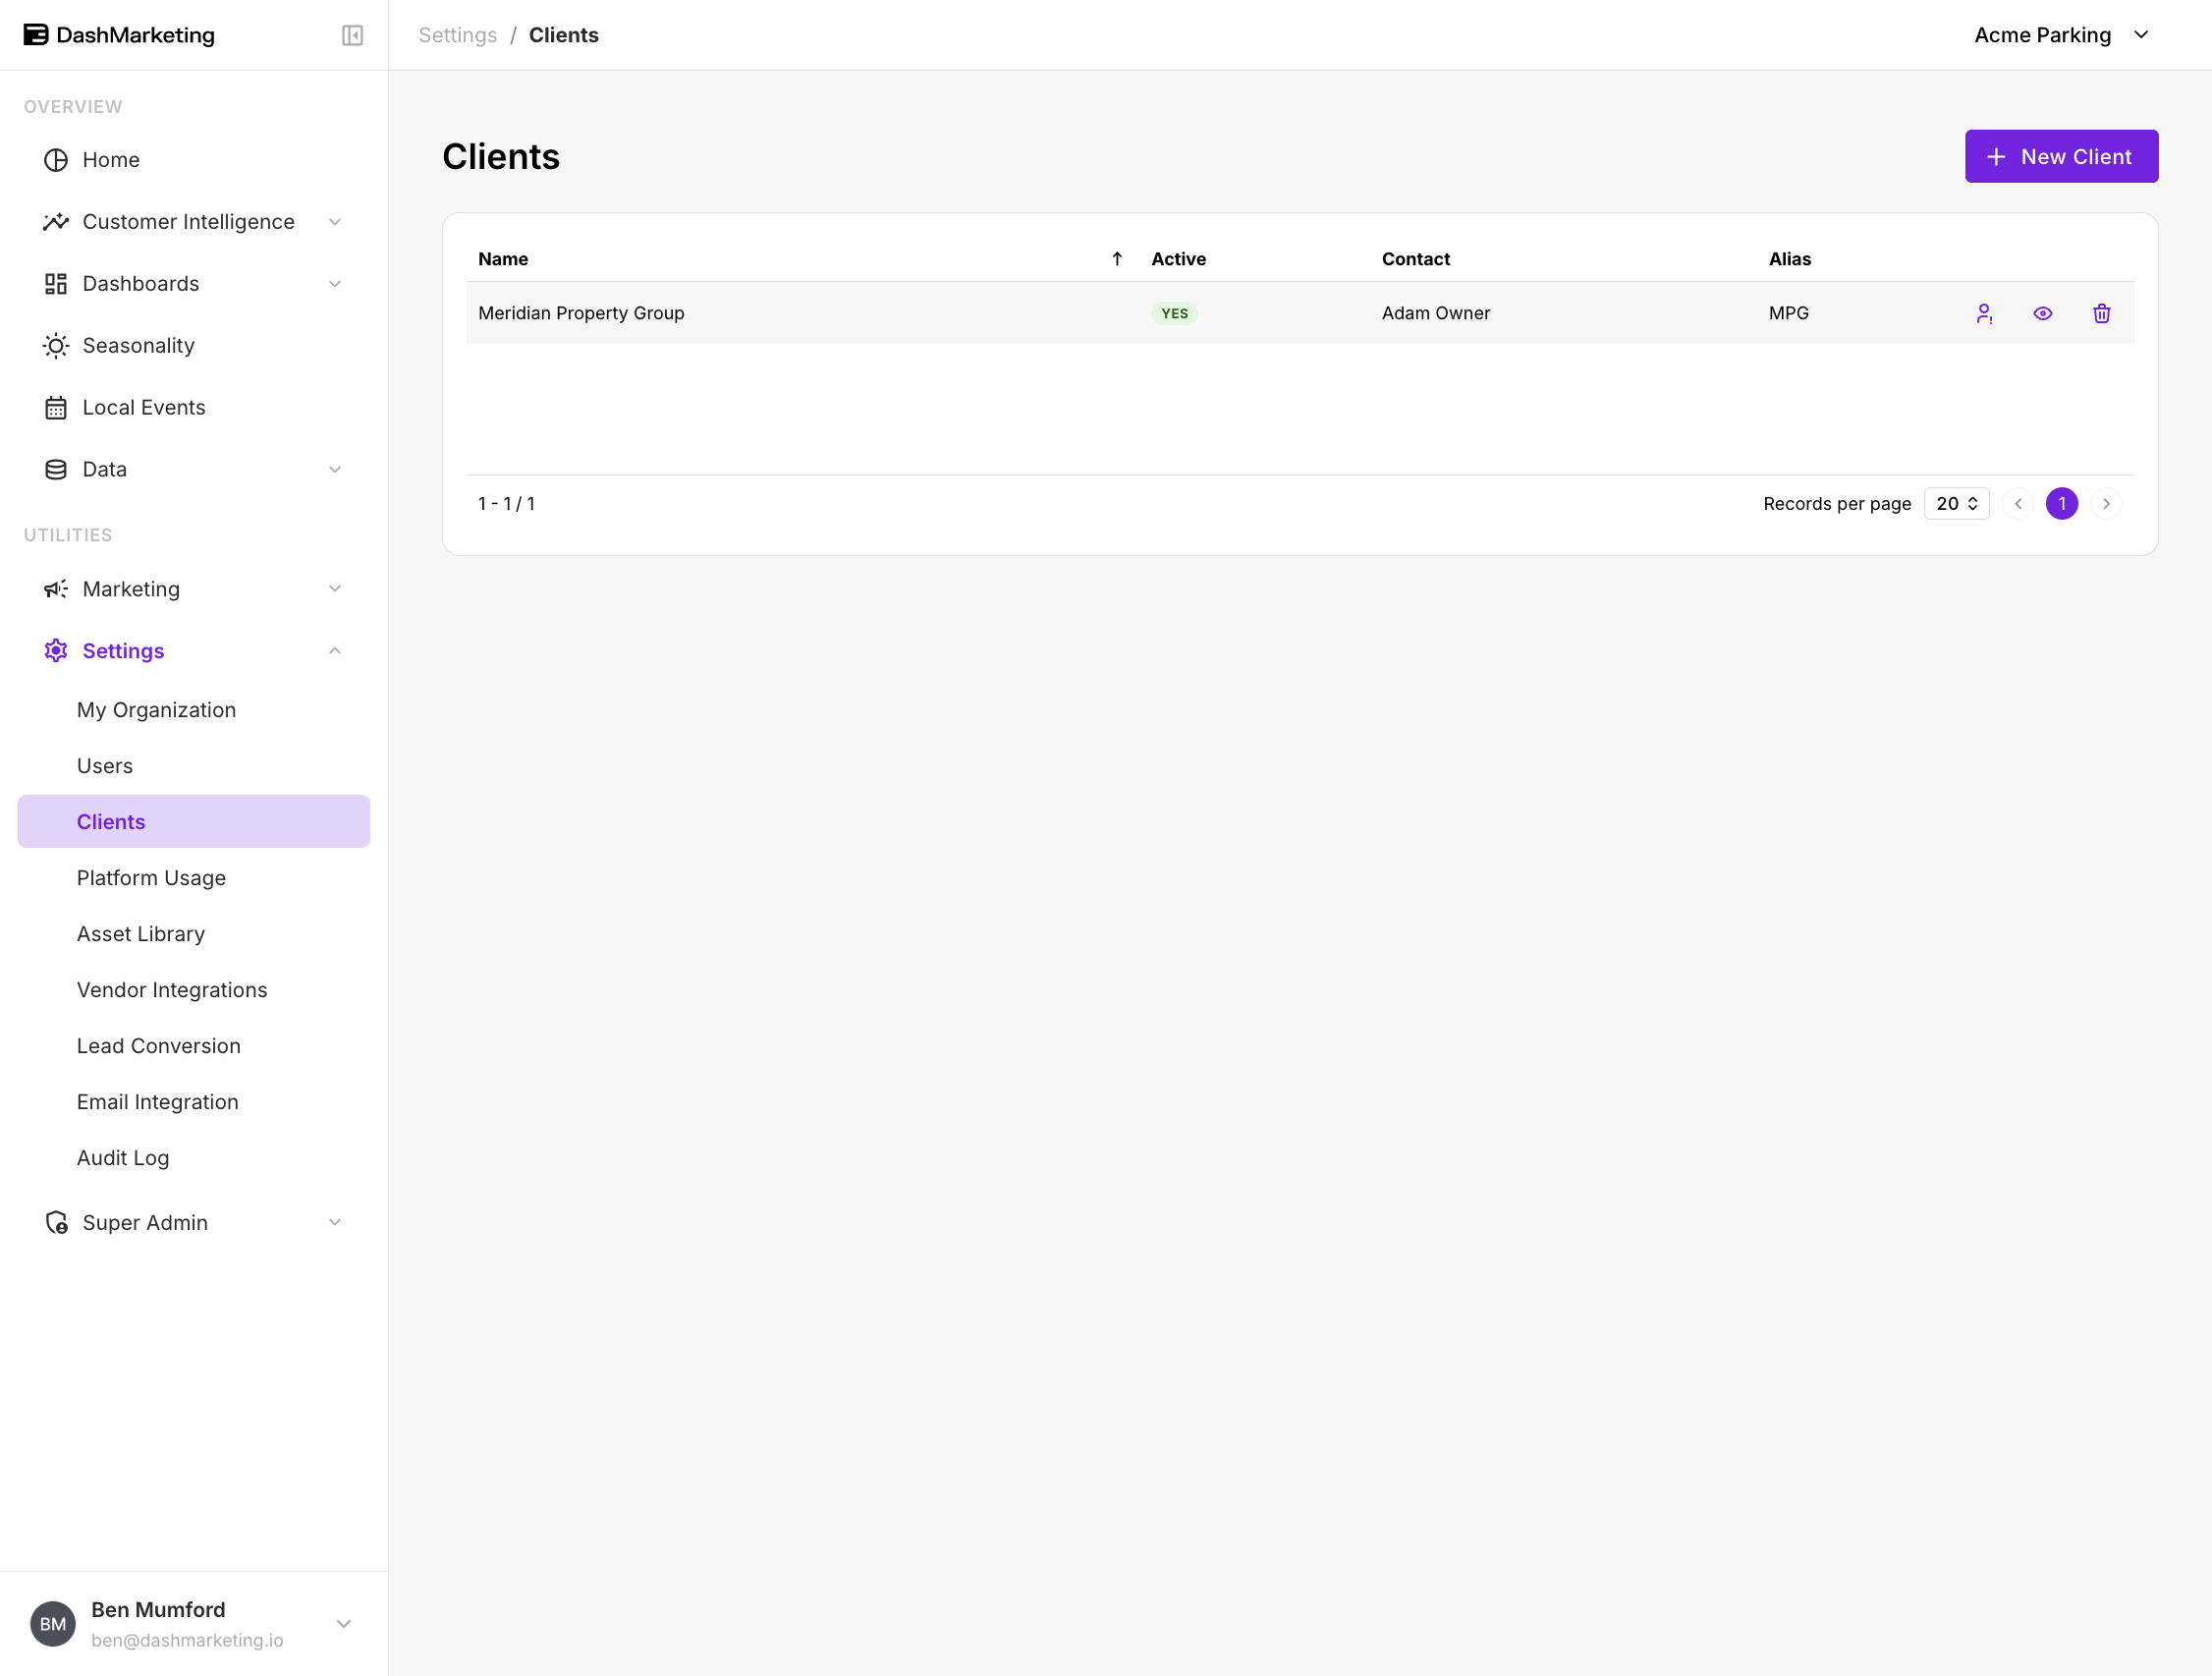
The list shows every client under your organization, with their active status, primary contact, and alias.
Creating a client
Go to Settings → Clients.
Click + New Client.
Fill in the details (see the field reference below).
Save.
The client is created with no locations attached. Attaching locations is the next step and it's the one that actually determines what they'll see.
Field reference
| Field | Required | Notes |
|---|---|---|
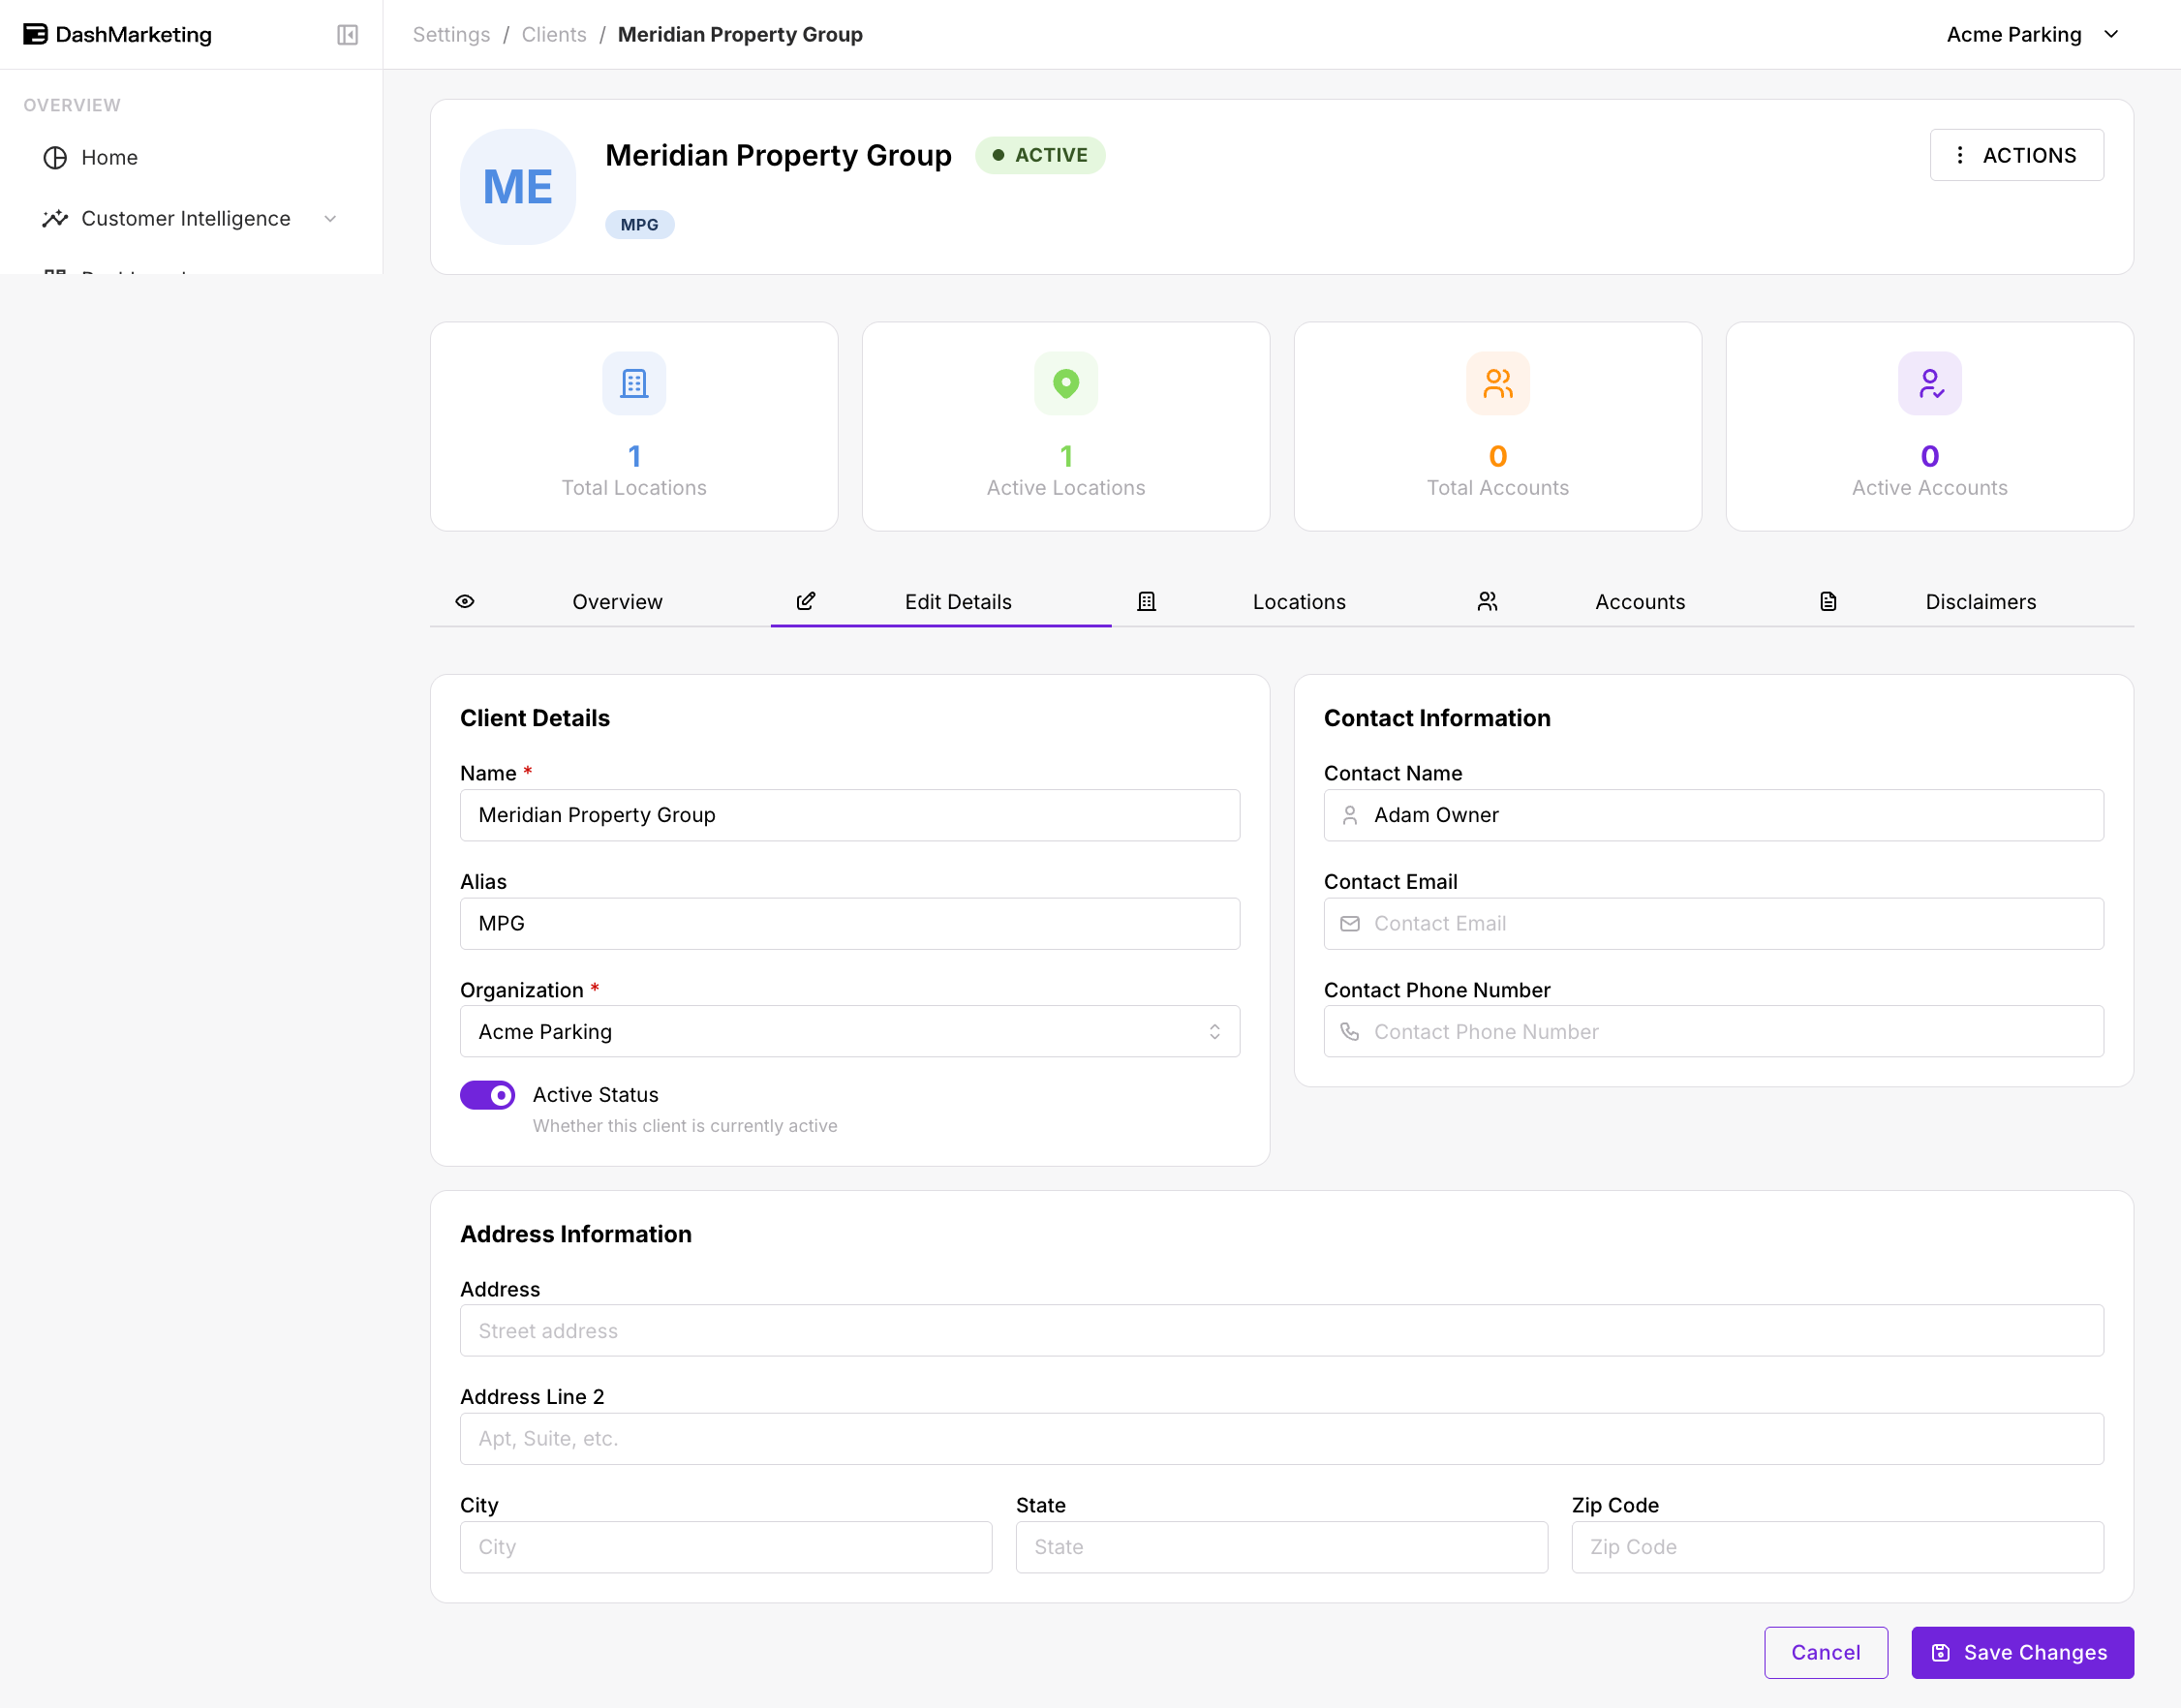
| Name | Yes | The client's business name. This is what appears in the top bar when they're signed in, and in your Client filter. |
| Alias | No | A short code (e.g. MPG). Useful when the full name is long — it shows as a chip on the client record. |
| Organization | Yes | Your org. Fixed for most users; visible because super admins can create clients across orgs. |
| Active Status | — | On by default. Turning it off keeps the record and its history but takes the client out of active use. |
| Contact Name / Email / Phone | No | The person you deal with. This is a reference field on the record — it does not create a login. Inviting a user is a separate step. |
| Address | No | Street, line 2, city, state, zip. |
 Contact ≠ user. Filling in a contact email does not give anyone access. It's an address book entry. To give someone a login, invite them under Settings → Users.
The client record
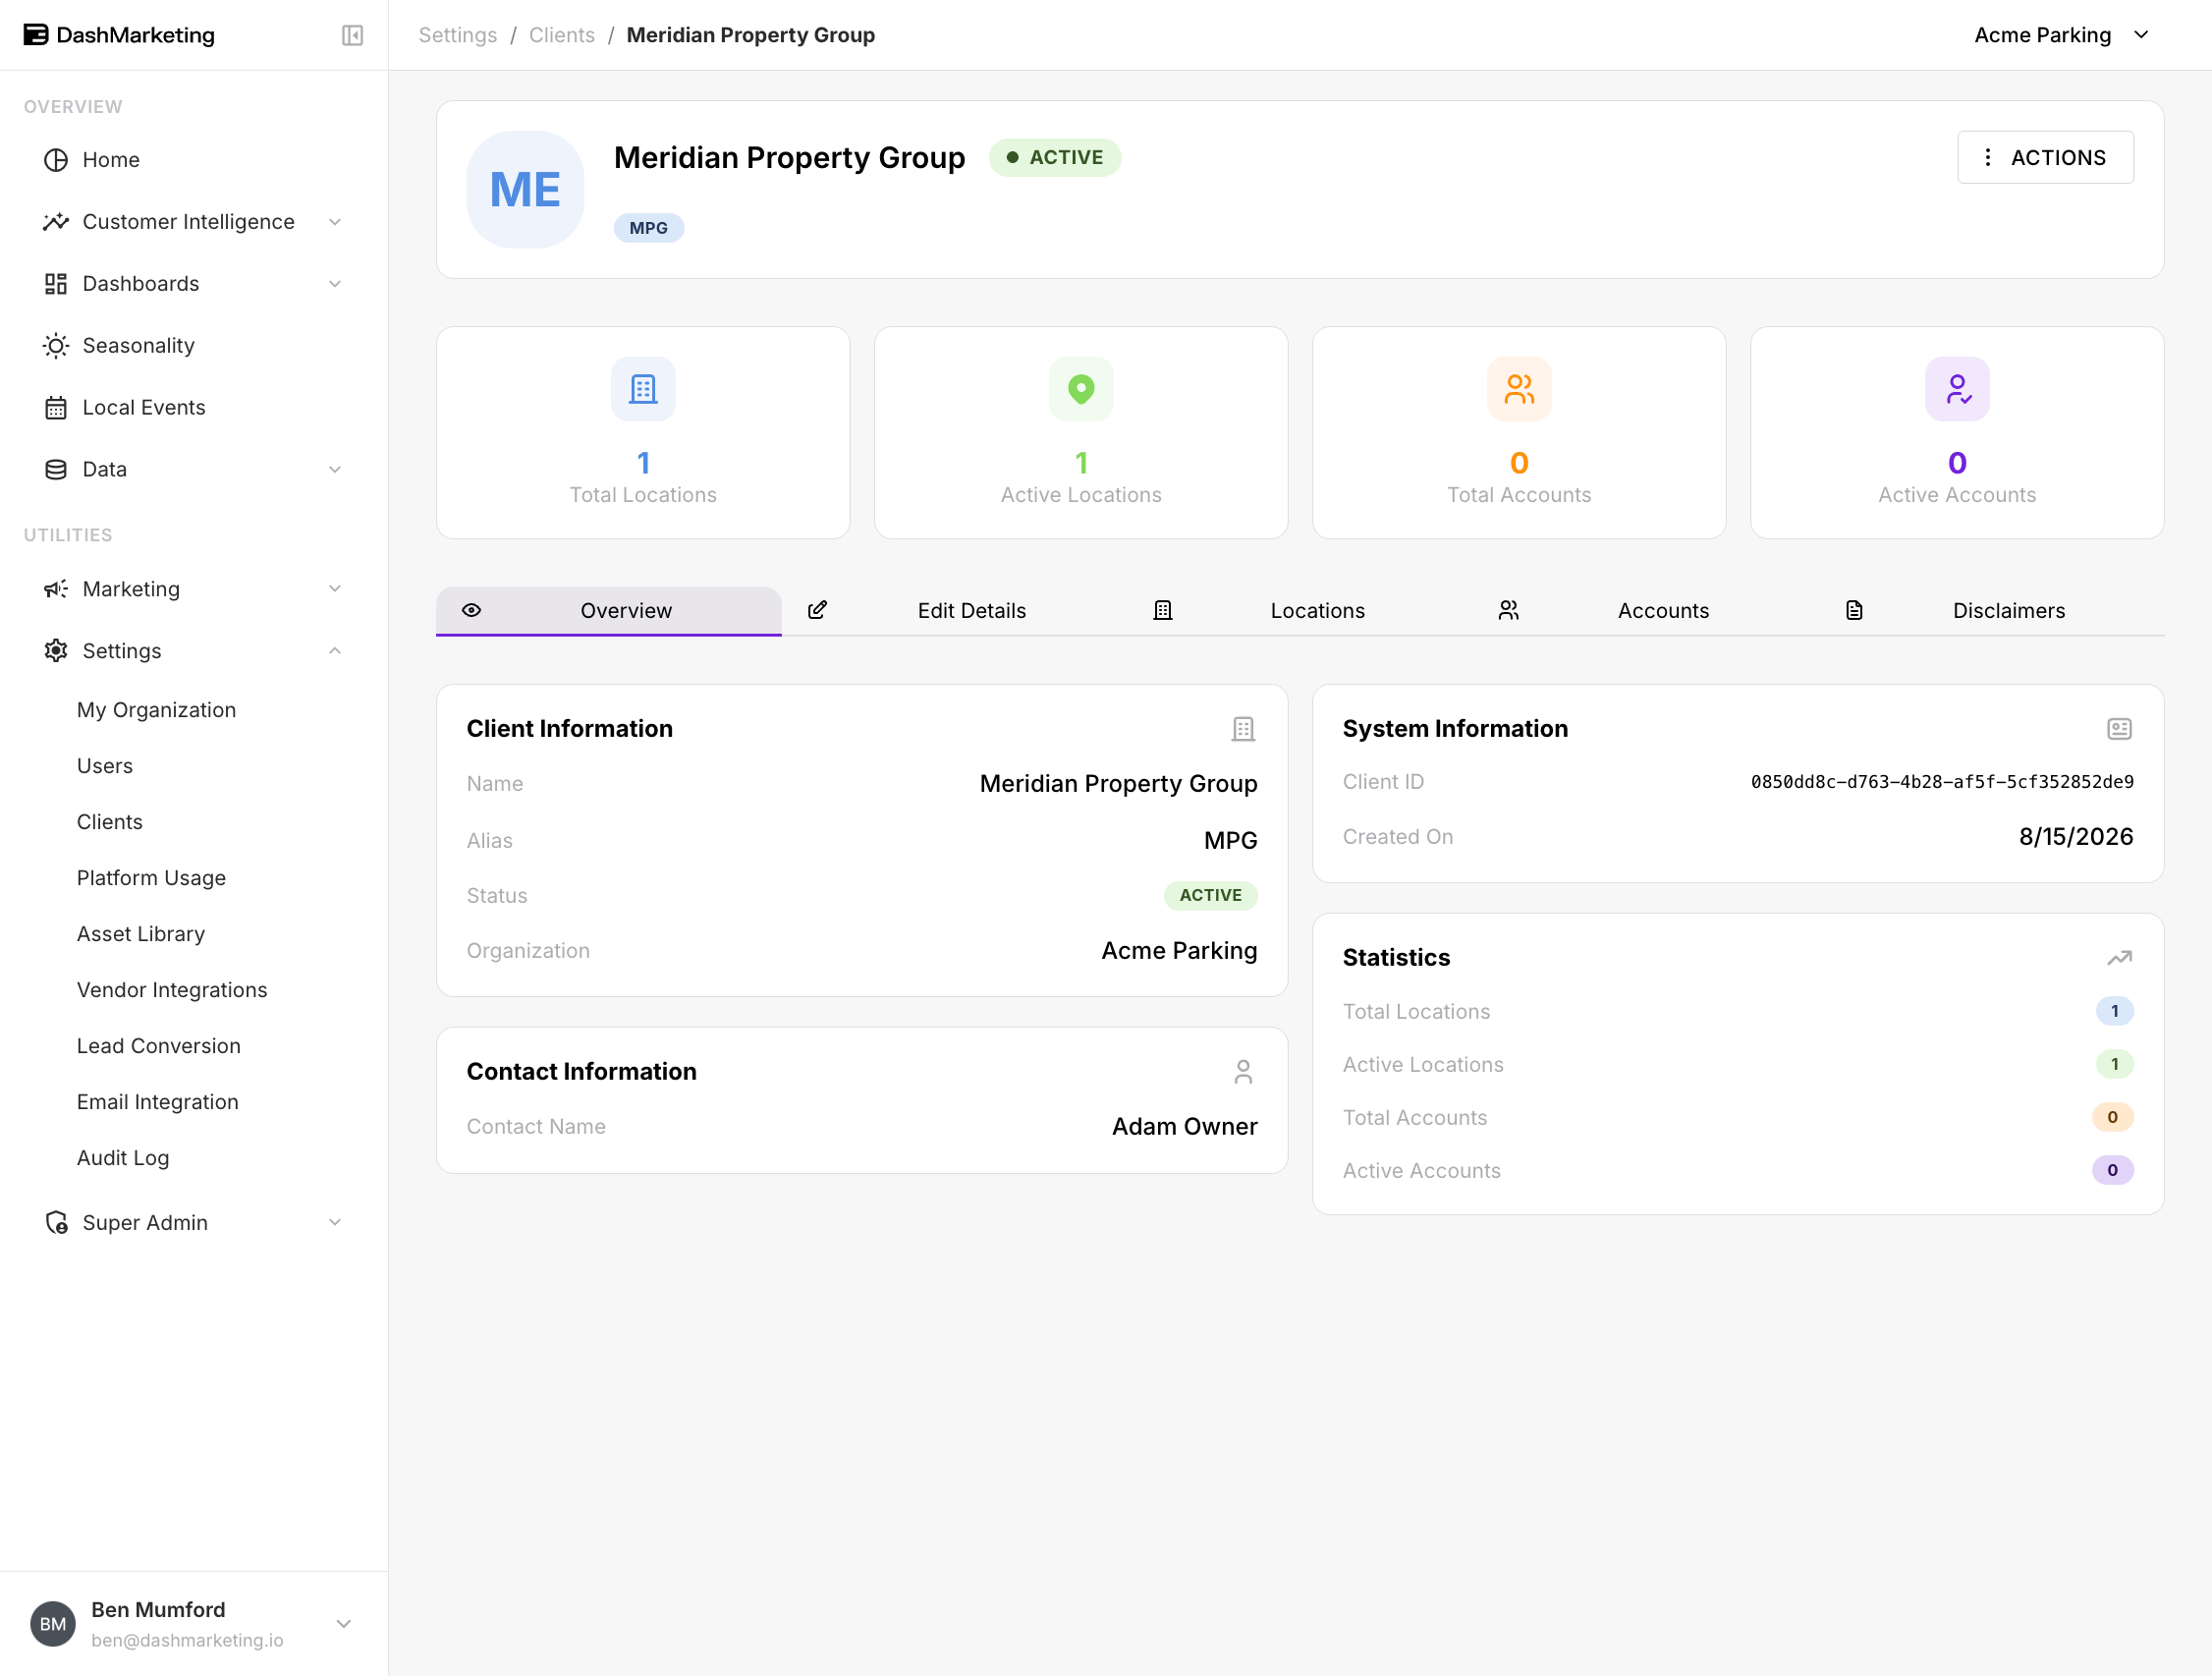
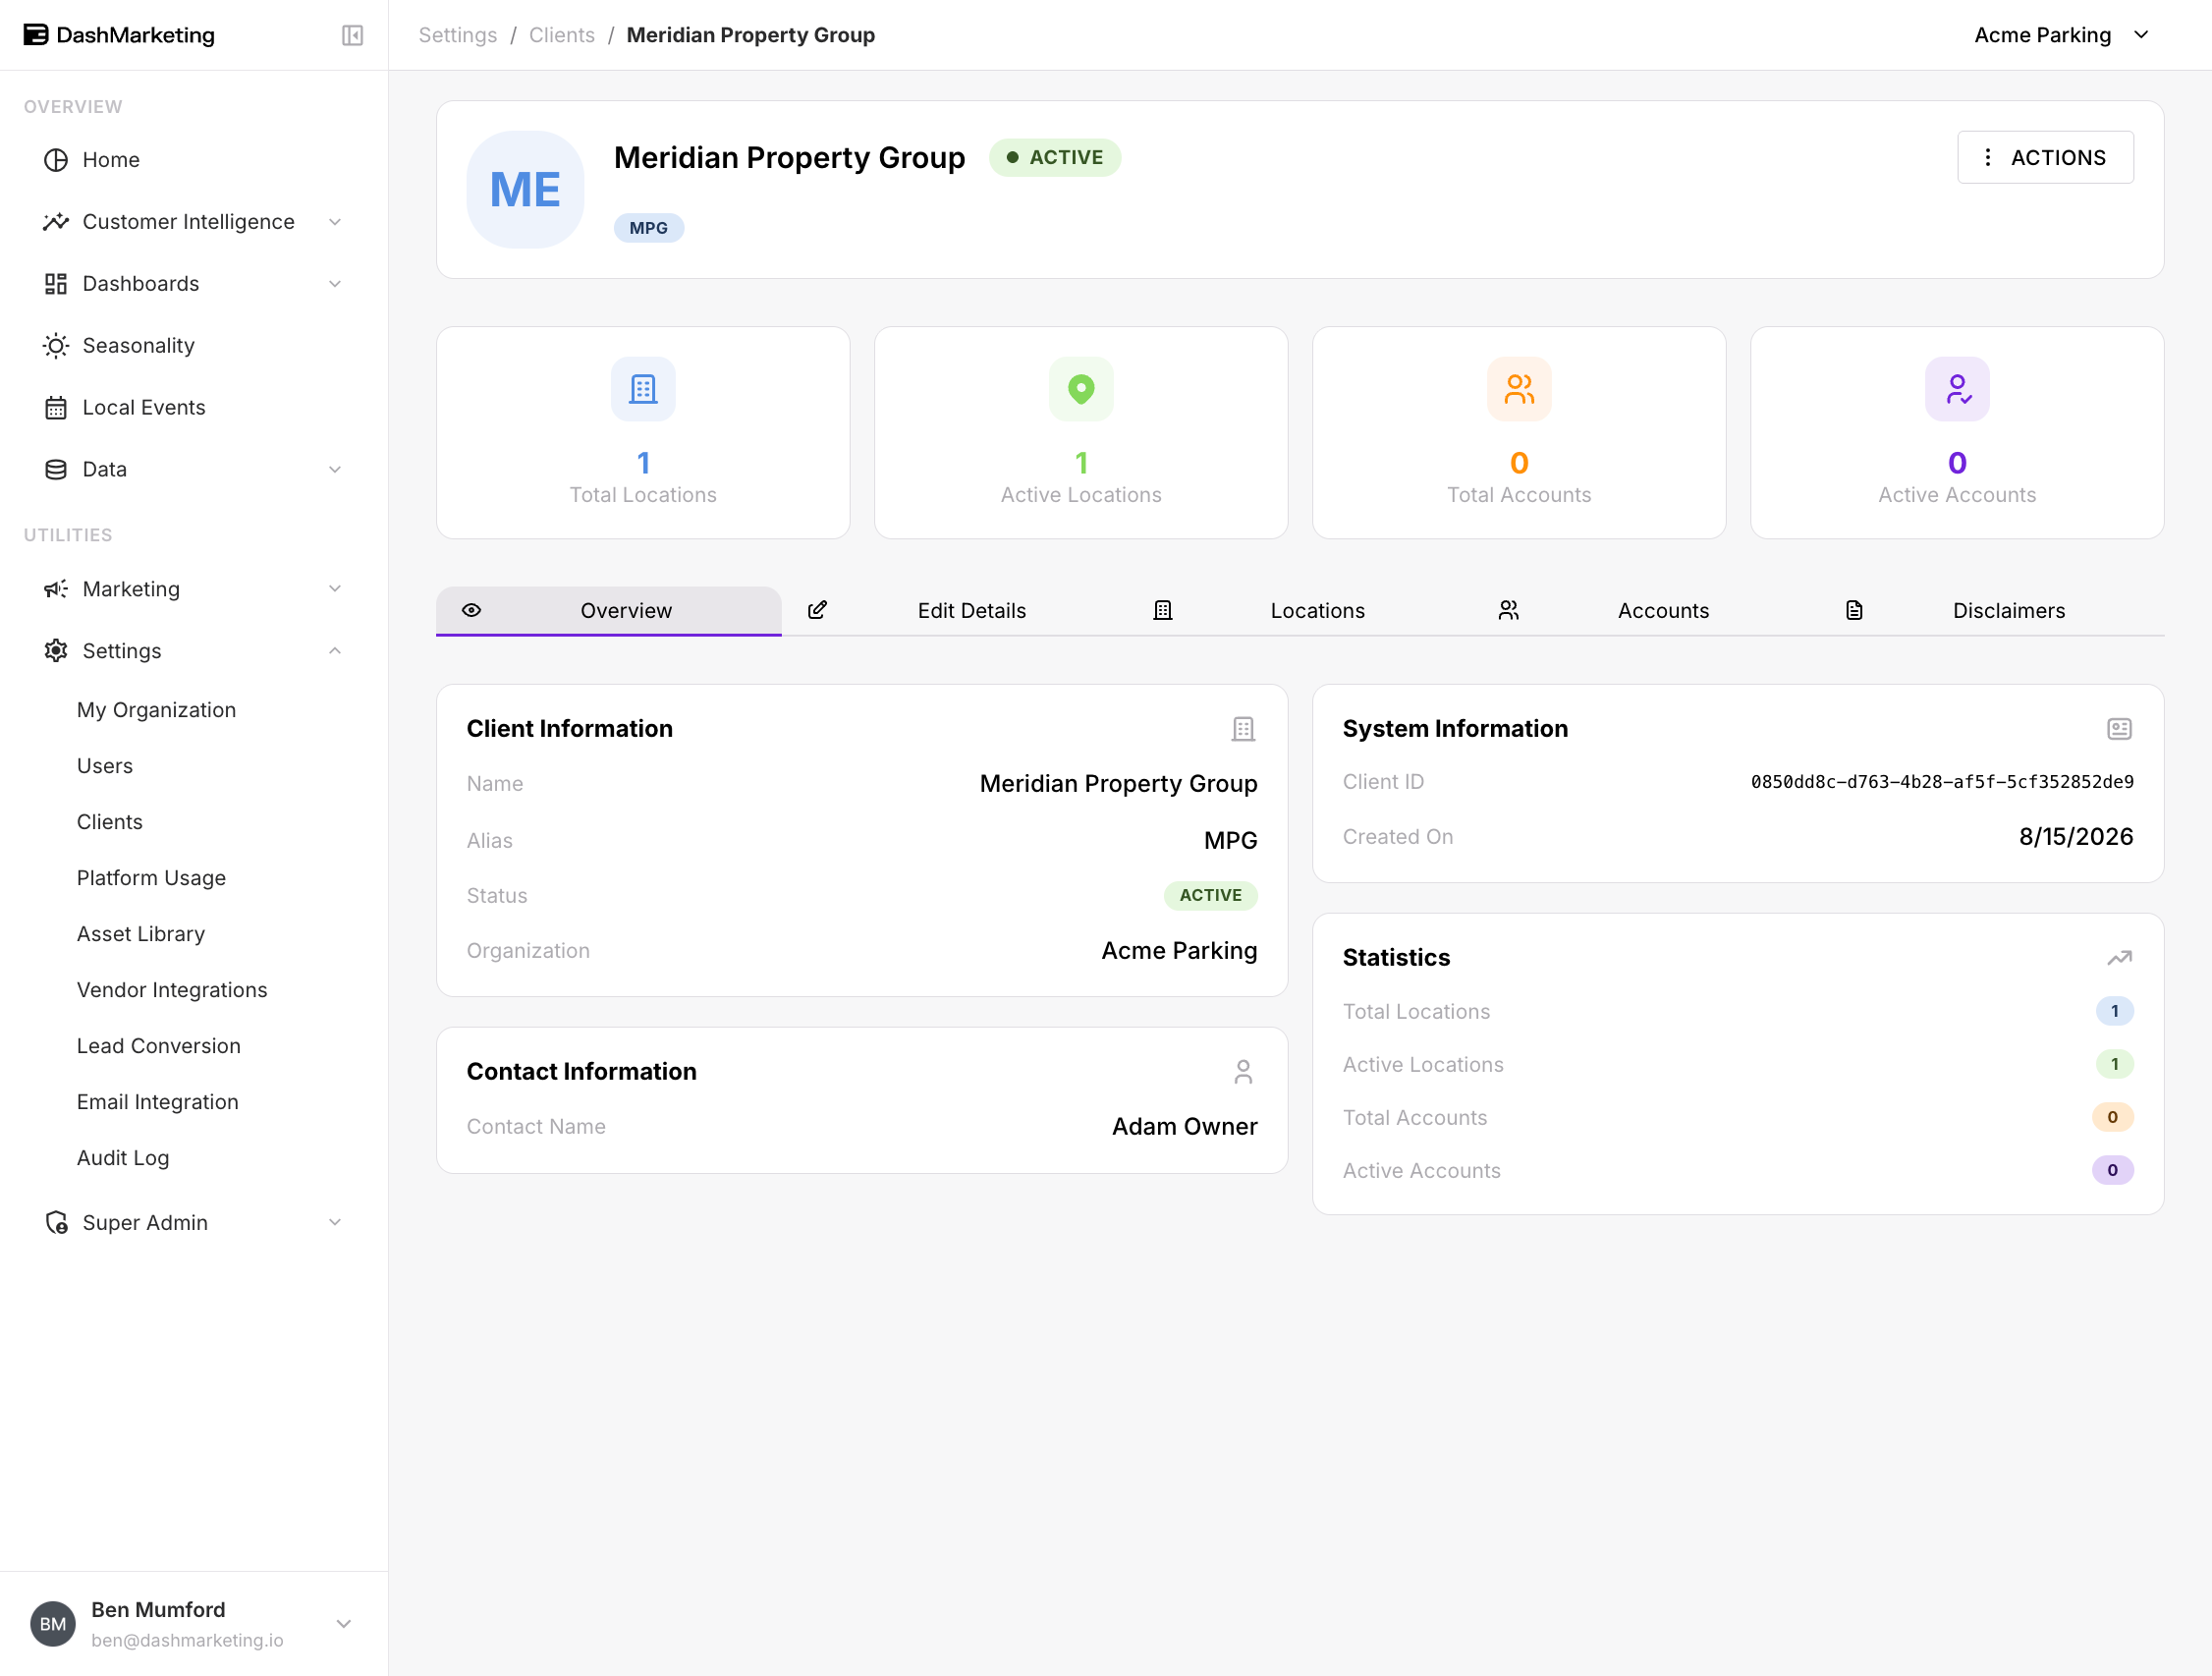
Opening a client (the eye icon on the list row) gives you a record with five tabs and a stat strip across the top: Total Locations, Active Locations, Total Accounts, Active Accounts.
| Tab | What it's for |
|---|---|
| Overview | Read-only summary — client info, contact, client ID, created date, statistics |
| Edit Details | The editable form described above |
| Locations | Which locations belong to this client |
| Accounts | Monthly parking accounts under this client's locations |
| Disclaimers | Notices shown on this client's dashboards |
Attaching locations
This is the step that defines the client's world. Every dashboard number they ever see is the sum of the locations attached to them.
The attachment is made on the location, not on the client. The client record's Locations tab shows you the result; it isn't where you set it.
Go to Data → Locations.
Open the location (eye icon on its row).
Go to the Edit Details tab.
Set the Client field at the top of Basic Information.
Save.
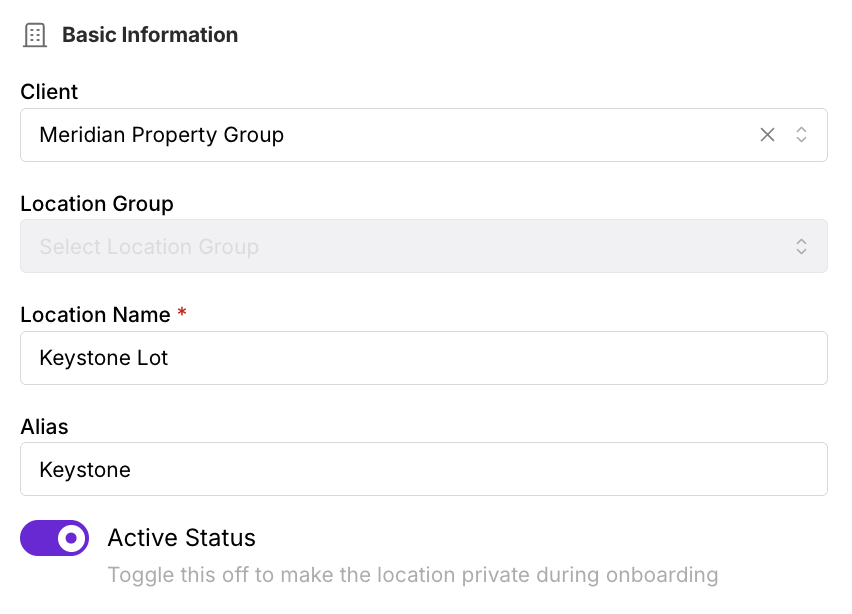 A location has one Client field, so it belongs to exactly one client — there's no sharing a garage between two clients. Clearing the field takes the location out of every client's view and leaves it org-only.
To confirm the result, open the client record's Locations tab. It lists every location currently pointing at that client.
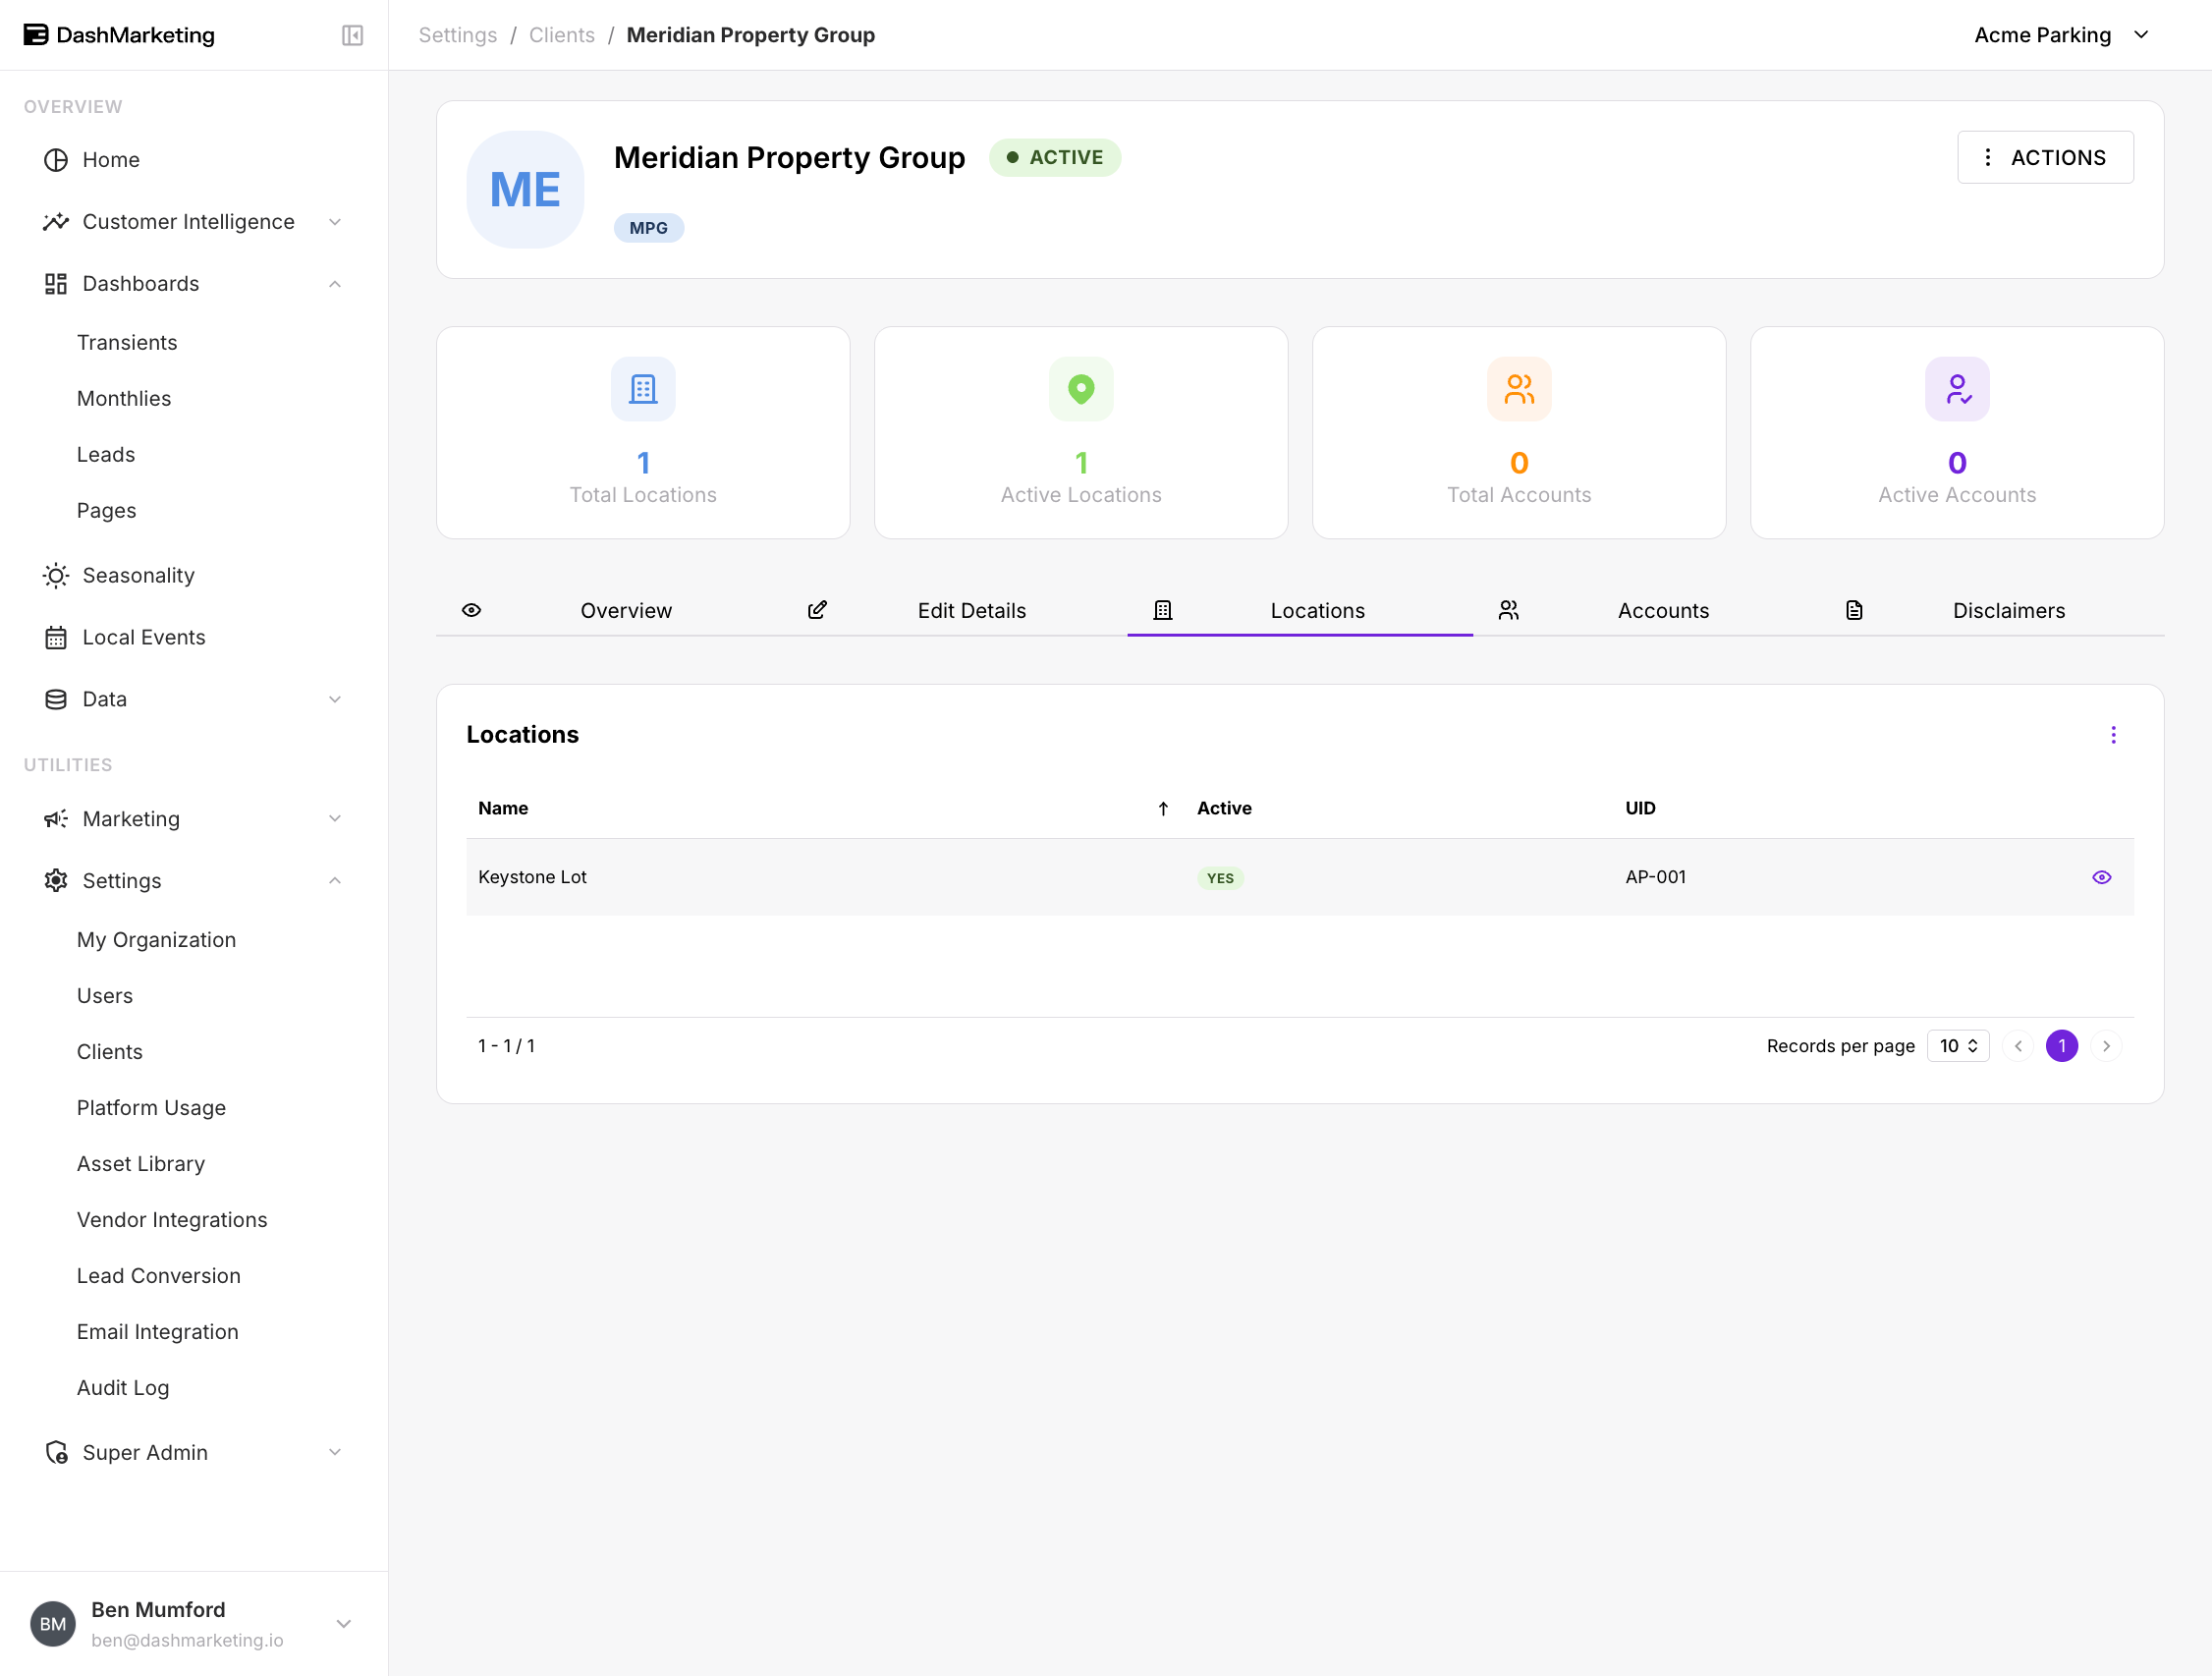 Check this before you invite anyone. An empty Locations tab means the client will sign in to a dashboard of zeroes. It looks broken, and it's the most common first-day support ticket.
Checking who can see a location
Location record → Access tab
The Access tab on any location lists every user who can currently see it, with their role and how they got there — Their client for a client user, Organization-wide for your own staff.
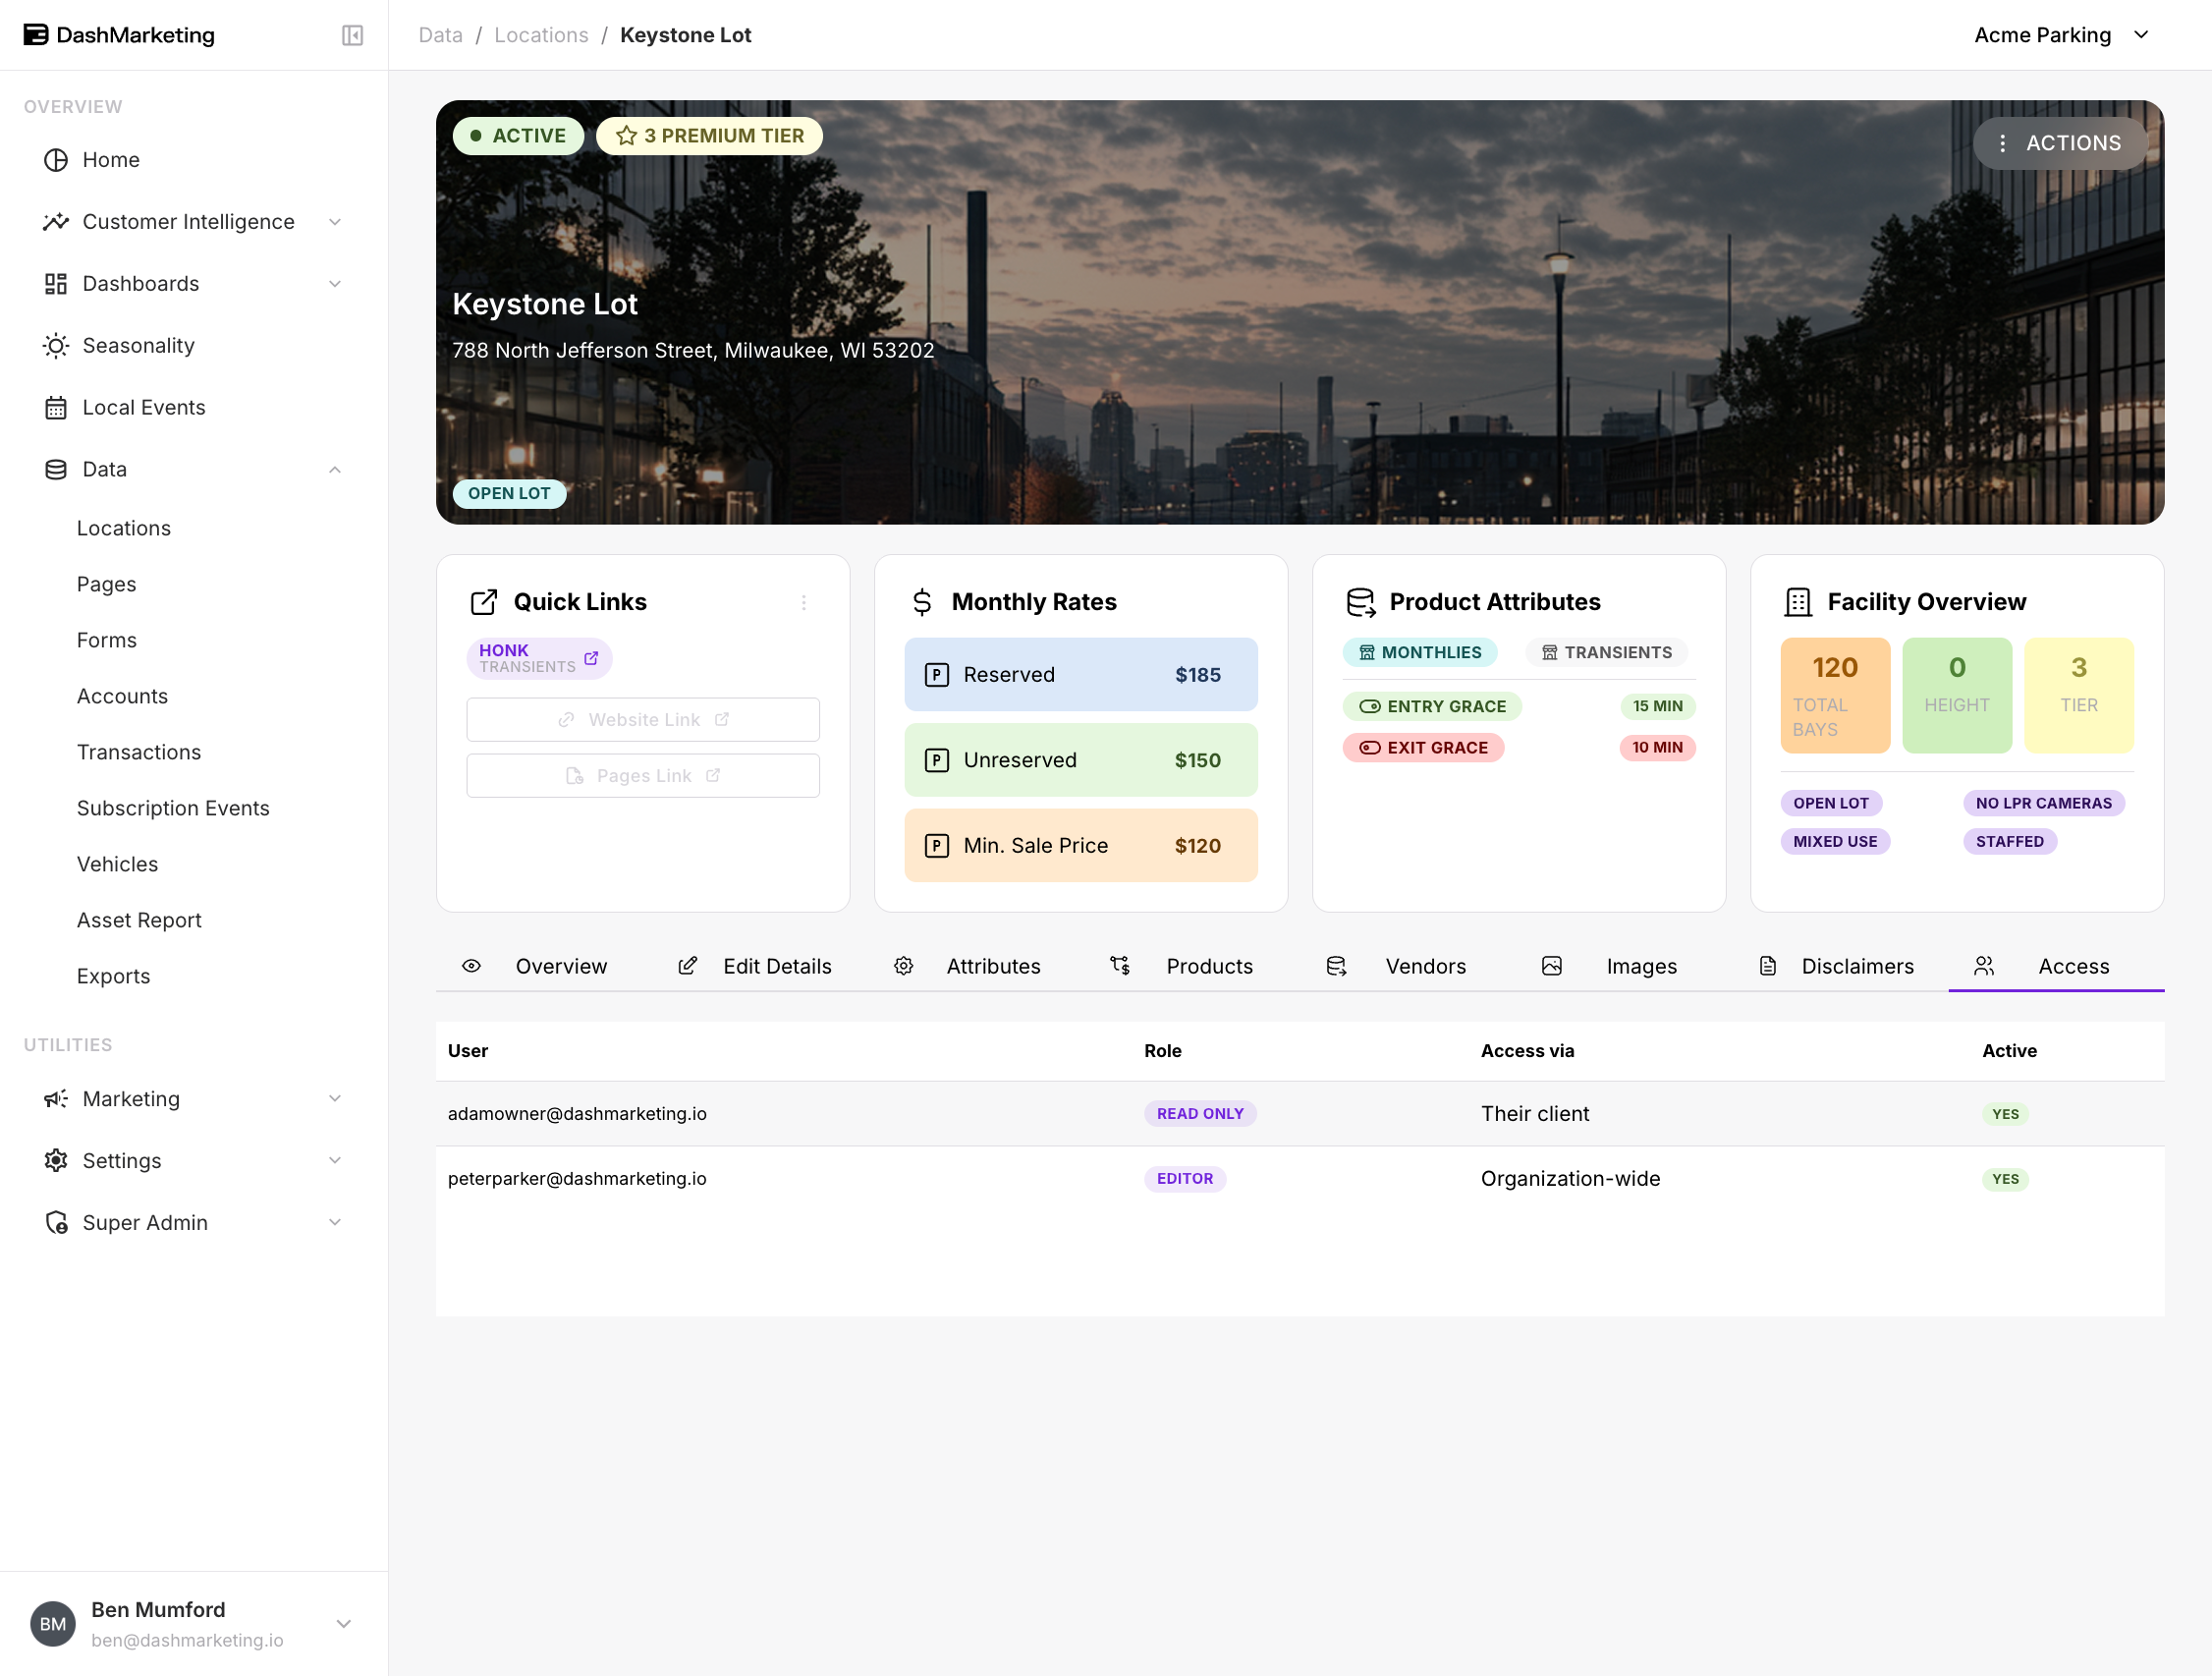 This is the check to run when a client asks whether anyone else can see their data, and when you're auditing after a staffing change.
Client-level disclaimers
Client record → Disclaimers tab
When a client's figures are provisional — a vendor feed is behind, a month is being reconciled — put a notice on their dashboards rather than fielding the email.
Disclaimers cascade down the hierarchy — organization, then client, then location — with each level overriding the one above it. Within any level, a dashboard-specific notice overrides the general one on that dashboard only.
📸 Screenshot needed — client-disclaimers-tab.png A client record on the Disclaimers tab with a General disclaimer set and at least one dashboard inheriting it. Call out: the OVERRIDES ORGANIZATION badge on General, and an INHERITED FROM GENERAL badge with its Override button on a dashboard row.
The client sees the notice as a banner above the dashboard content. For the full behaviour — writing, scoping, and reverting disclaimers — see the Disclaimers guide.
Deactivating a client
Set Active Status to off on the Edit Details tab. The record and its history stay. Deleting a client (the bin icon on the list) is a different, heavier action — deactivate first unless you're certain.
Next
Client users and roles — give someone a login
Previewing with View as Client — check your work before you send credentials
Was this page helpful?